Care Provider: Post a Photo
Find out how to post a photo as a care provider.

Written by Georgia Radcliffe
Updated at February 6th, 2026
What does a photo post look like on CareApp?
The most popular post to make on CareApp is the photo post. As the saying goes “A picture is worth 1,000 words”. A photo shared on CareApp with family can really give families peace of mind about their loved one's wellbeing and care.
.png)
Who can post a photo?
If you have a Team Member, Site Coordinator, or Provider Administrator account on CareApp you can post a photo for your care recipients.
How do I post a photo?
Please see the tutorial video below for an in-depth guide to creating a photo post or see the step-by-step guide below. Please click on the tab below that aligns with the type of device yo are using CareApp on.
Mobile & Tablet
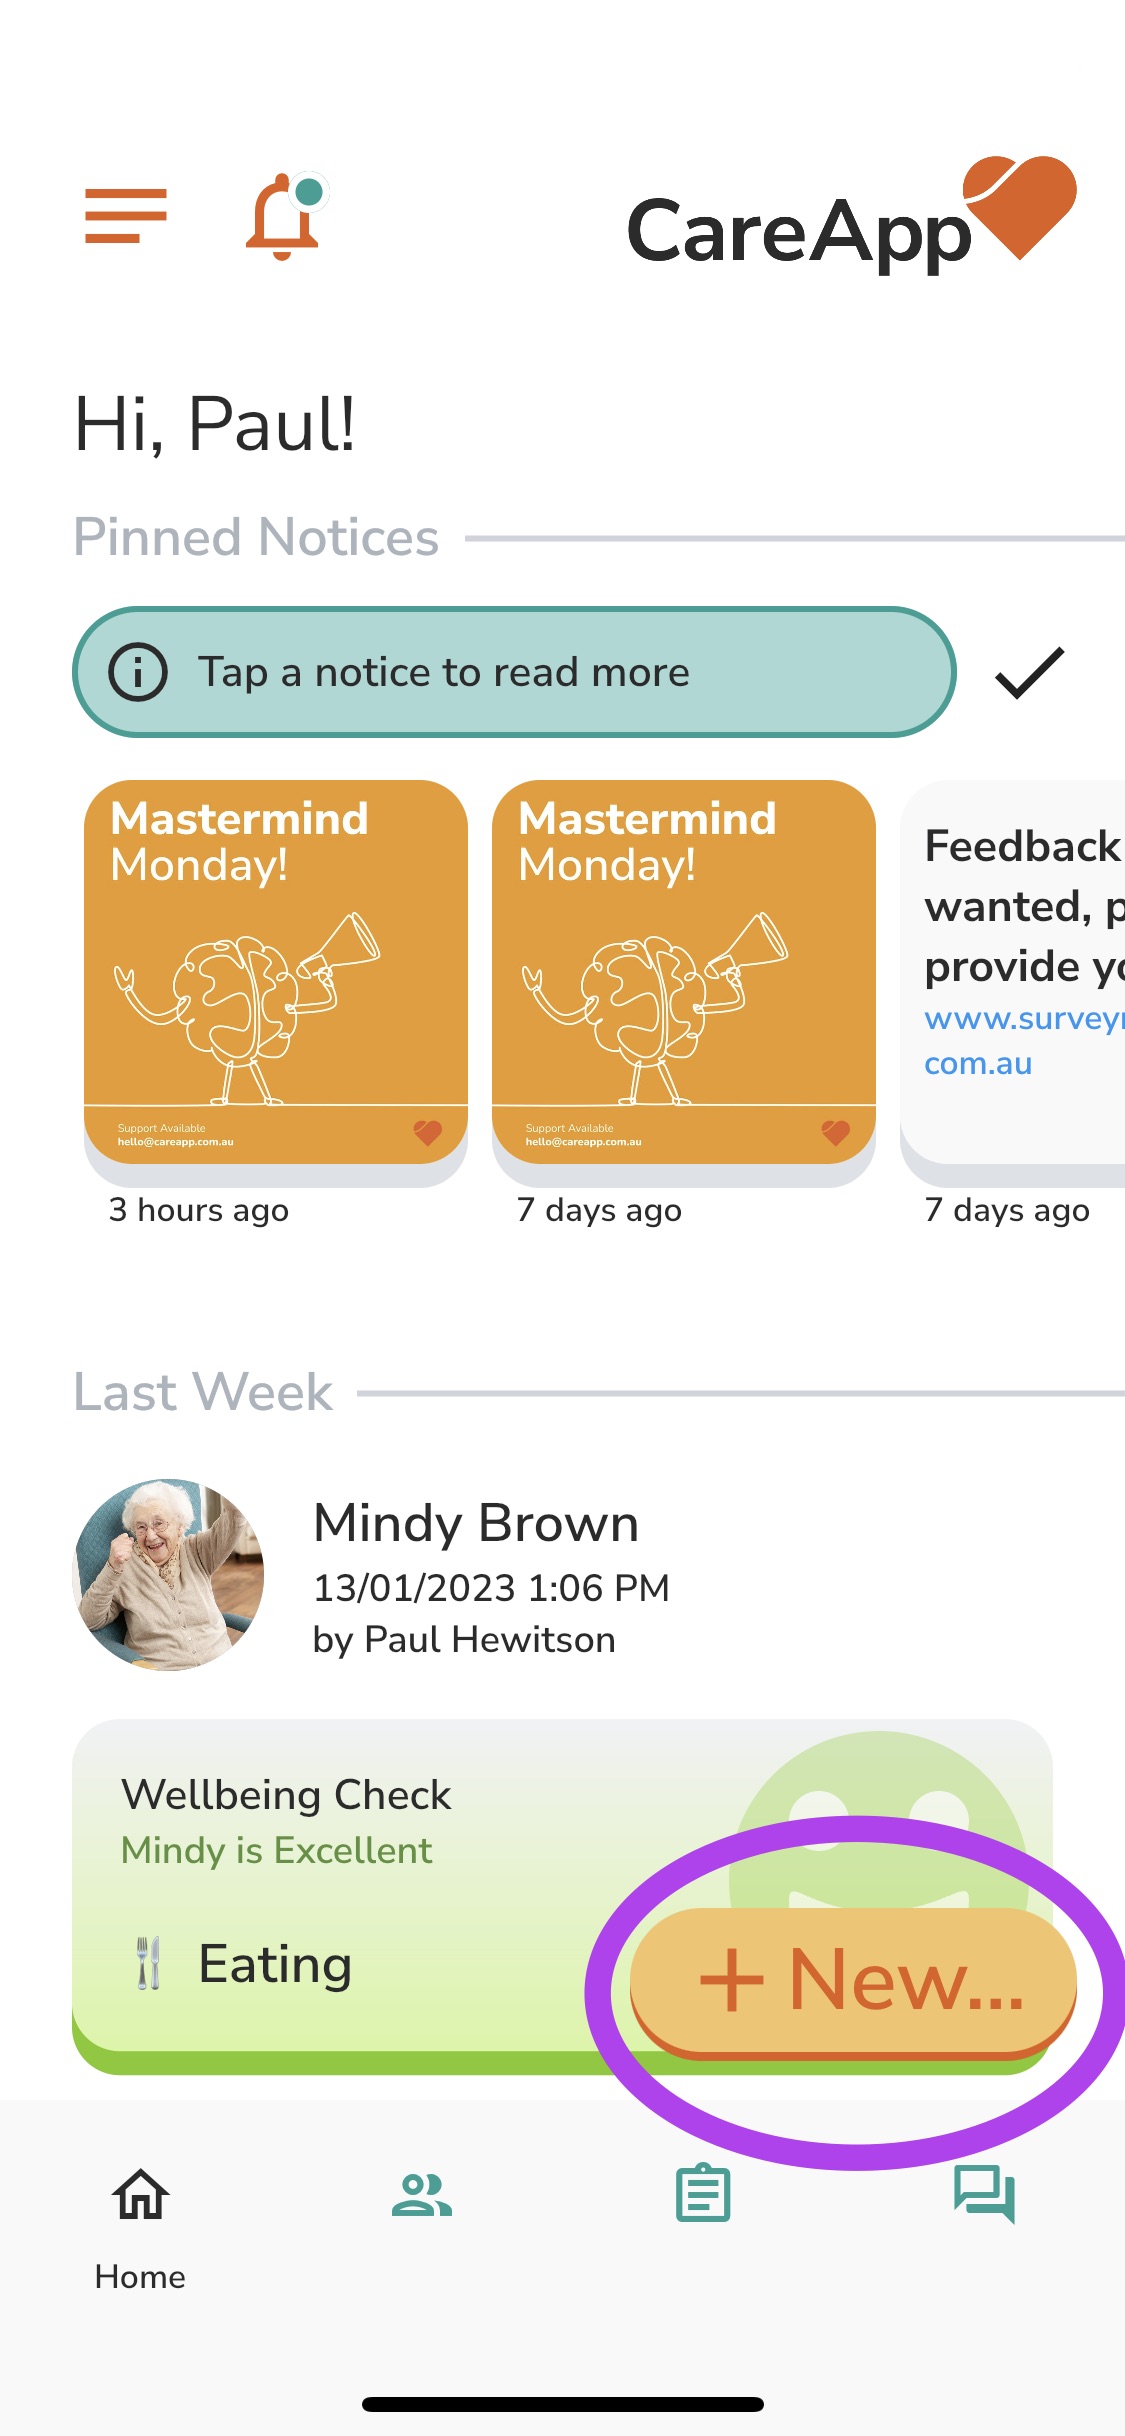
- Tap on the big +New button at the bottom of the screen.
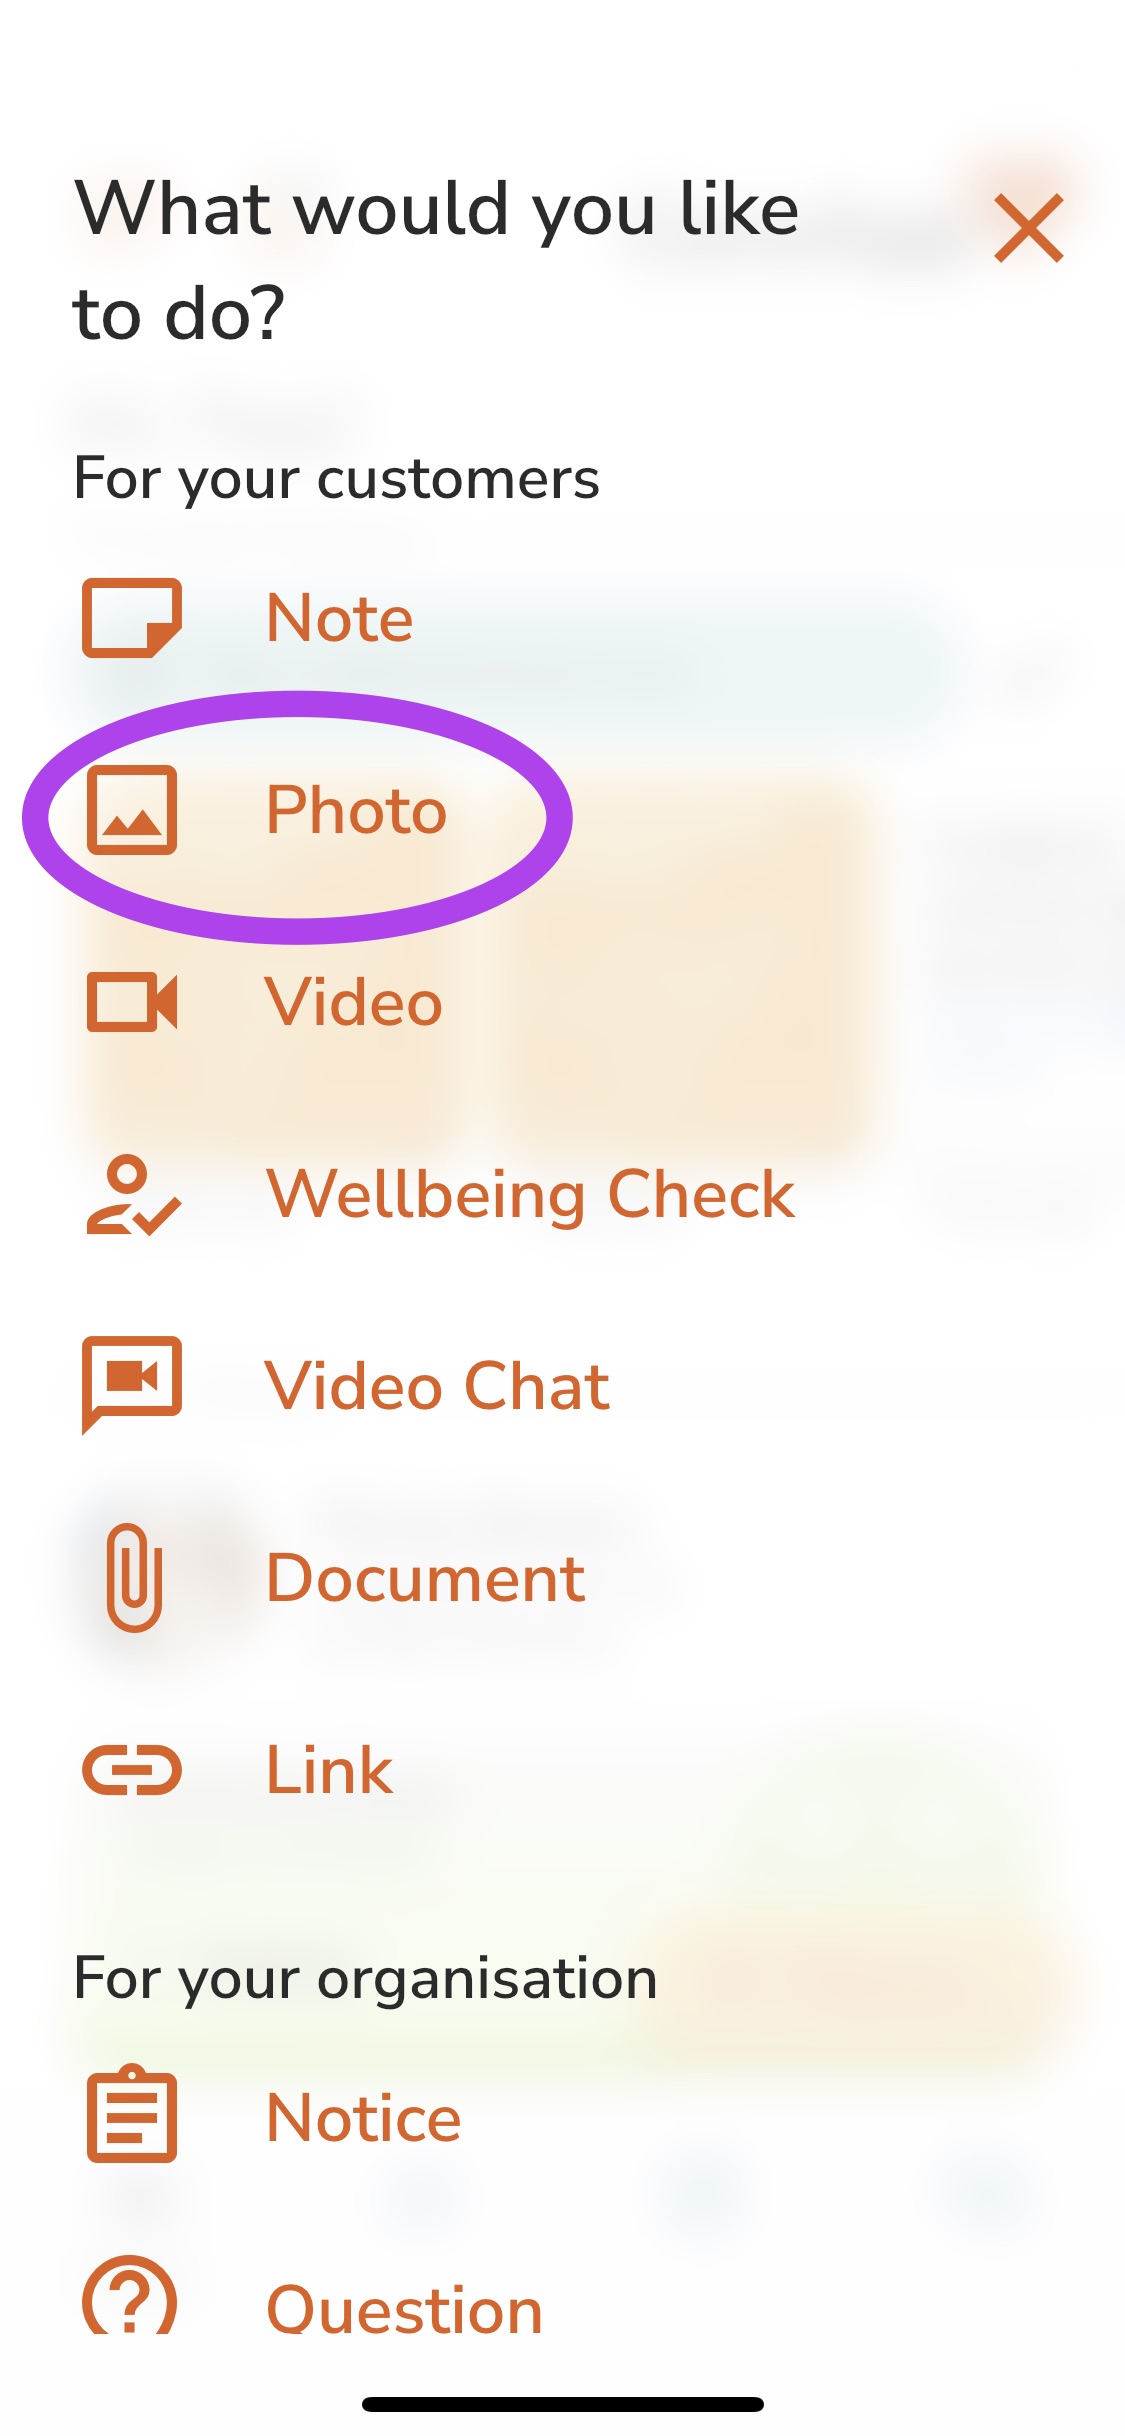
- Tap on 'Photo' from the menu.
- Tap 'Select people'.

- Find the customer you wish to make a photo post for. Search for them by scrolling down the list or searching their name in the 'Filter' search bar.
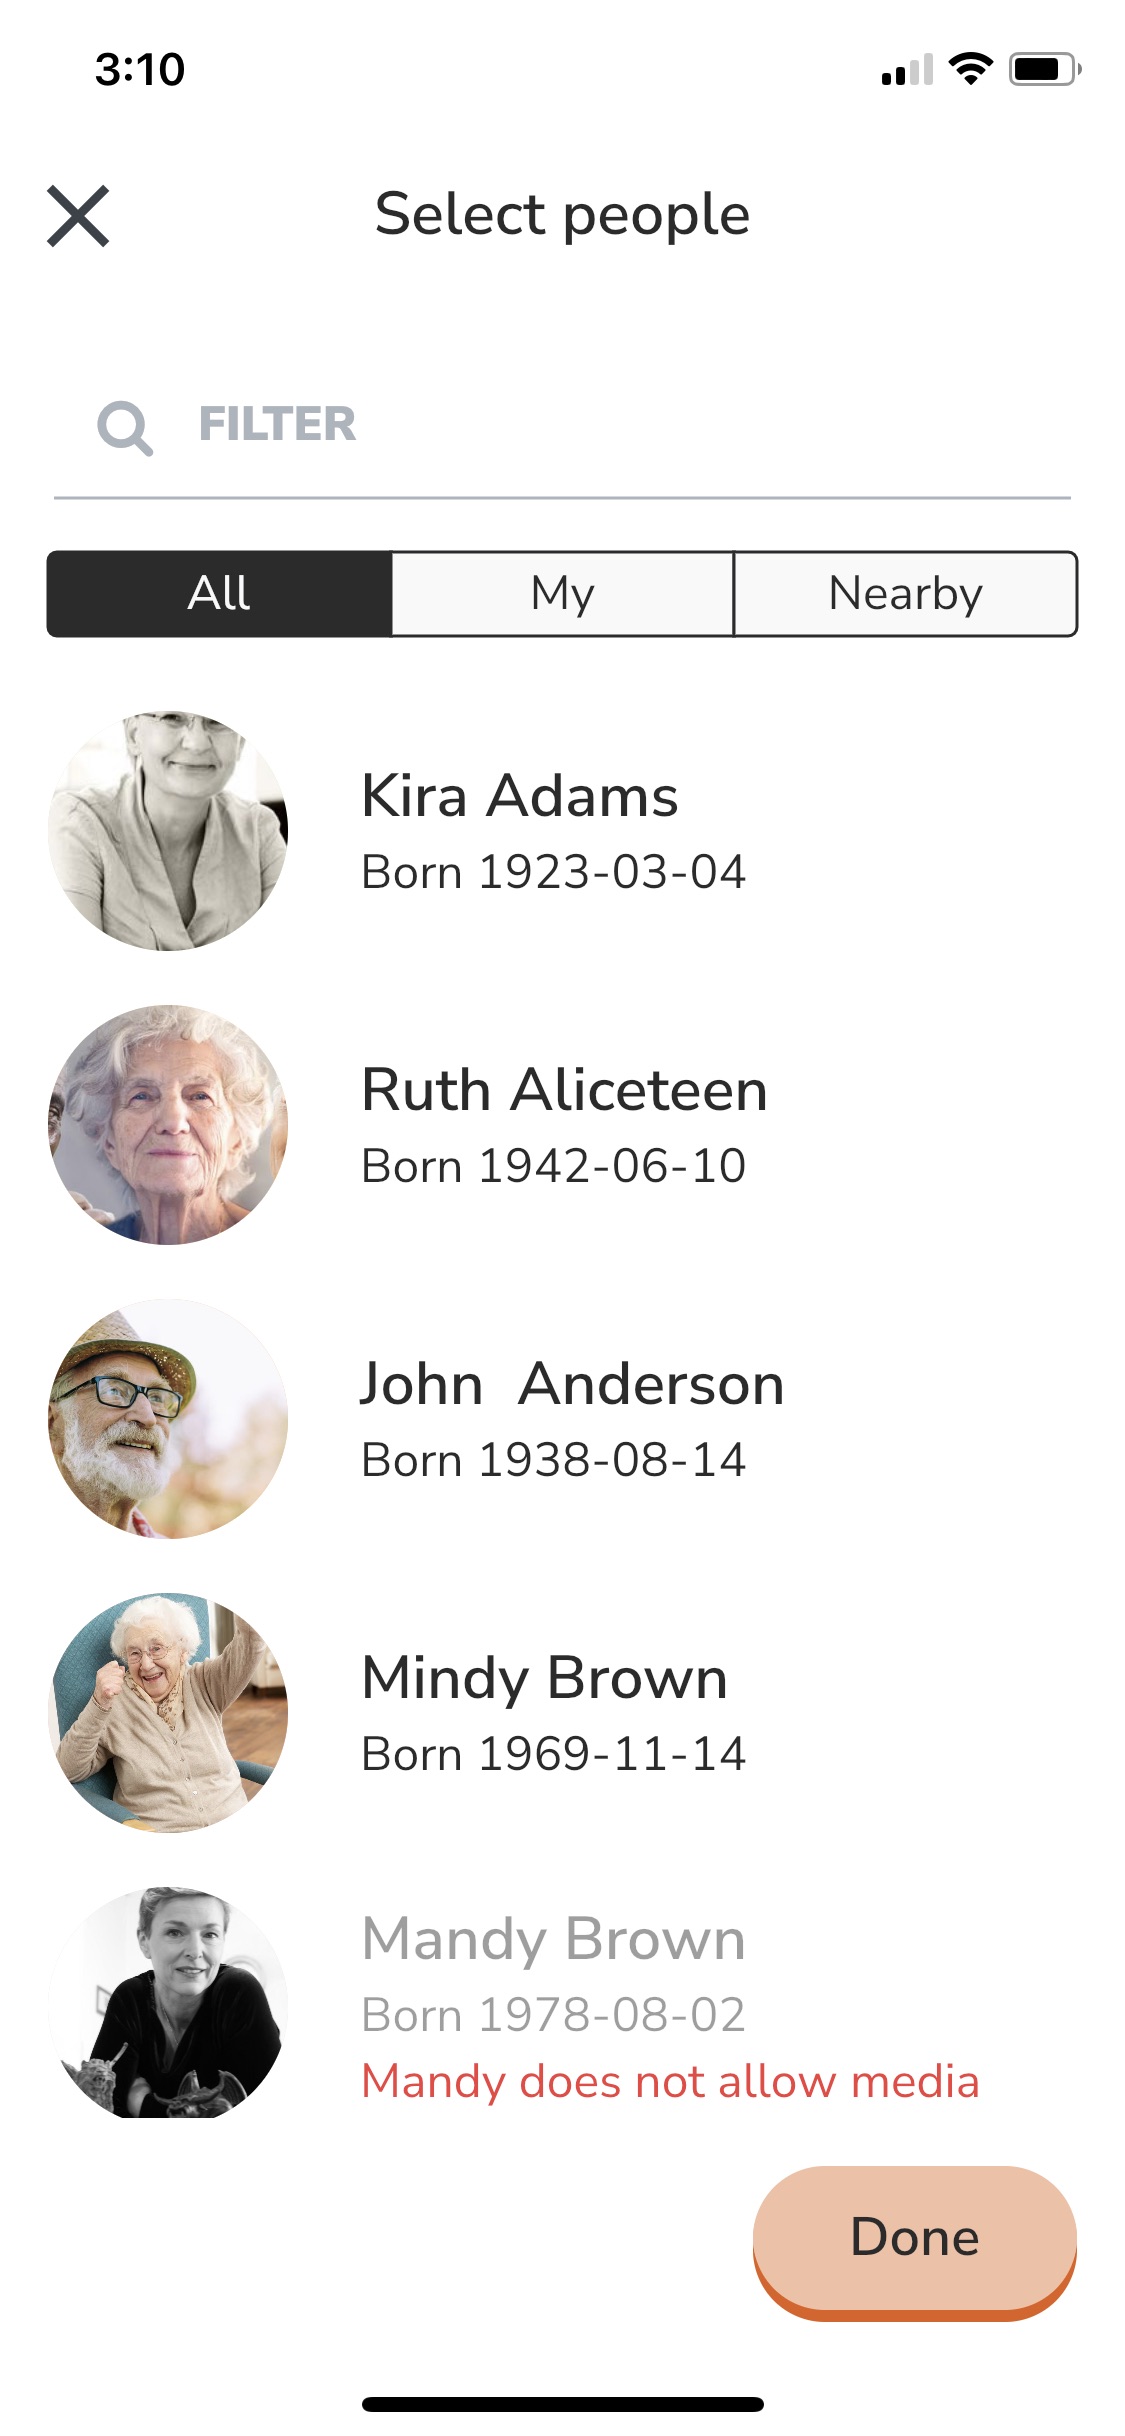
- Select the customer by tapping their name. This will highlight them and add their name to the list at the bottom of the screen. You can select one customer or you can select multiple.
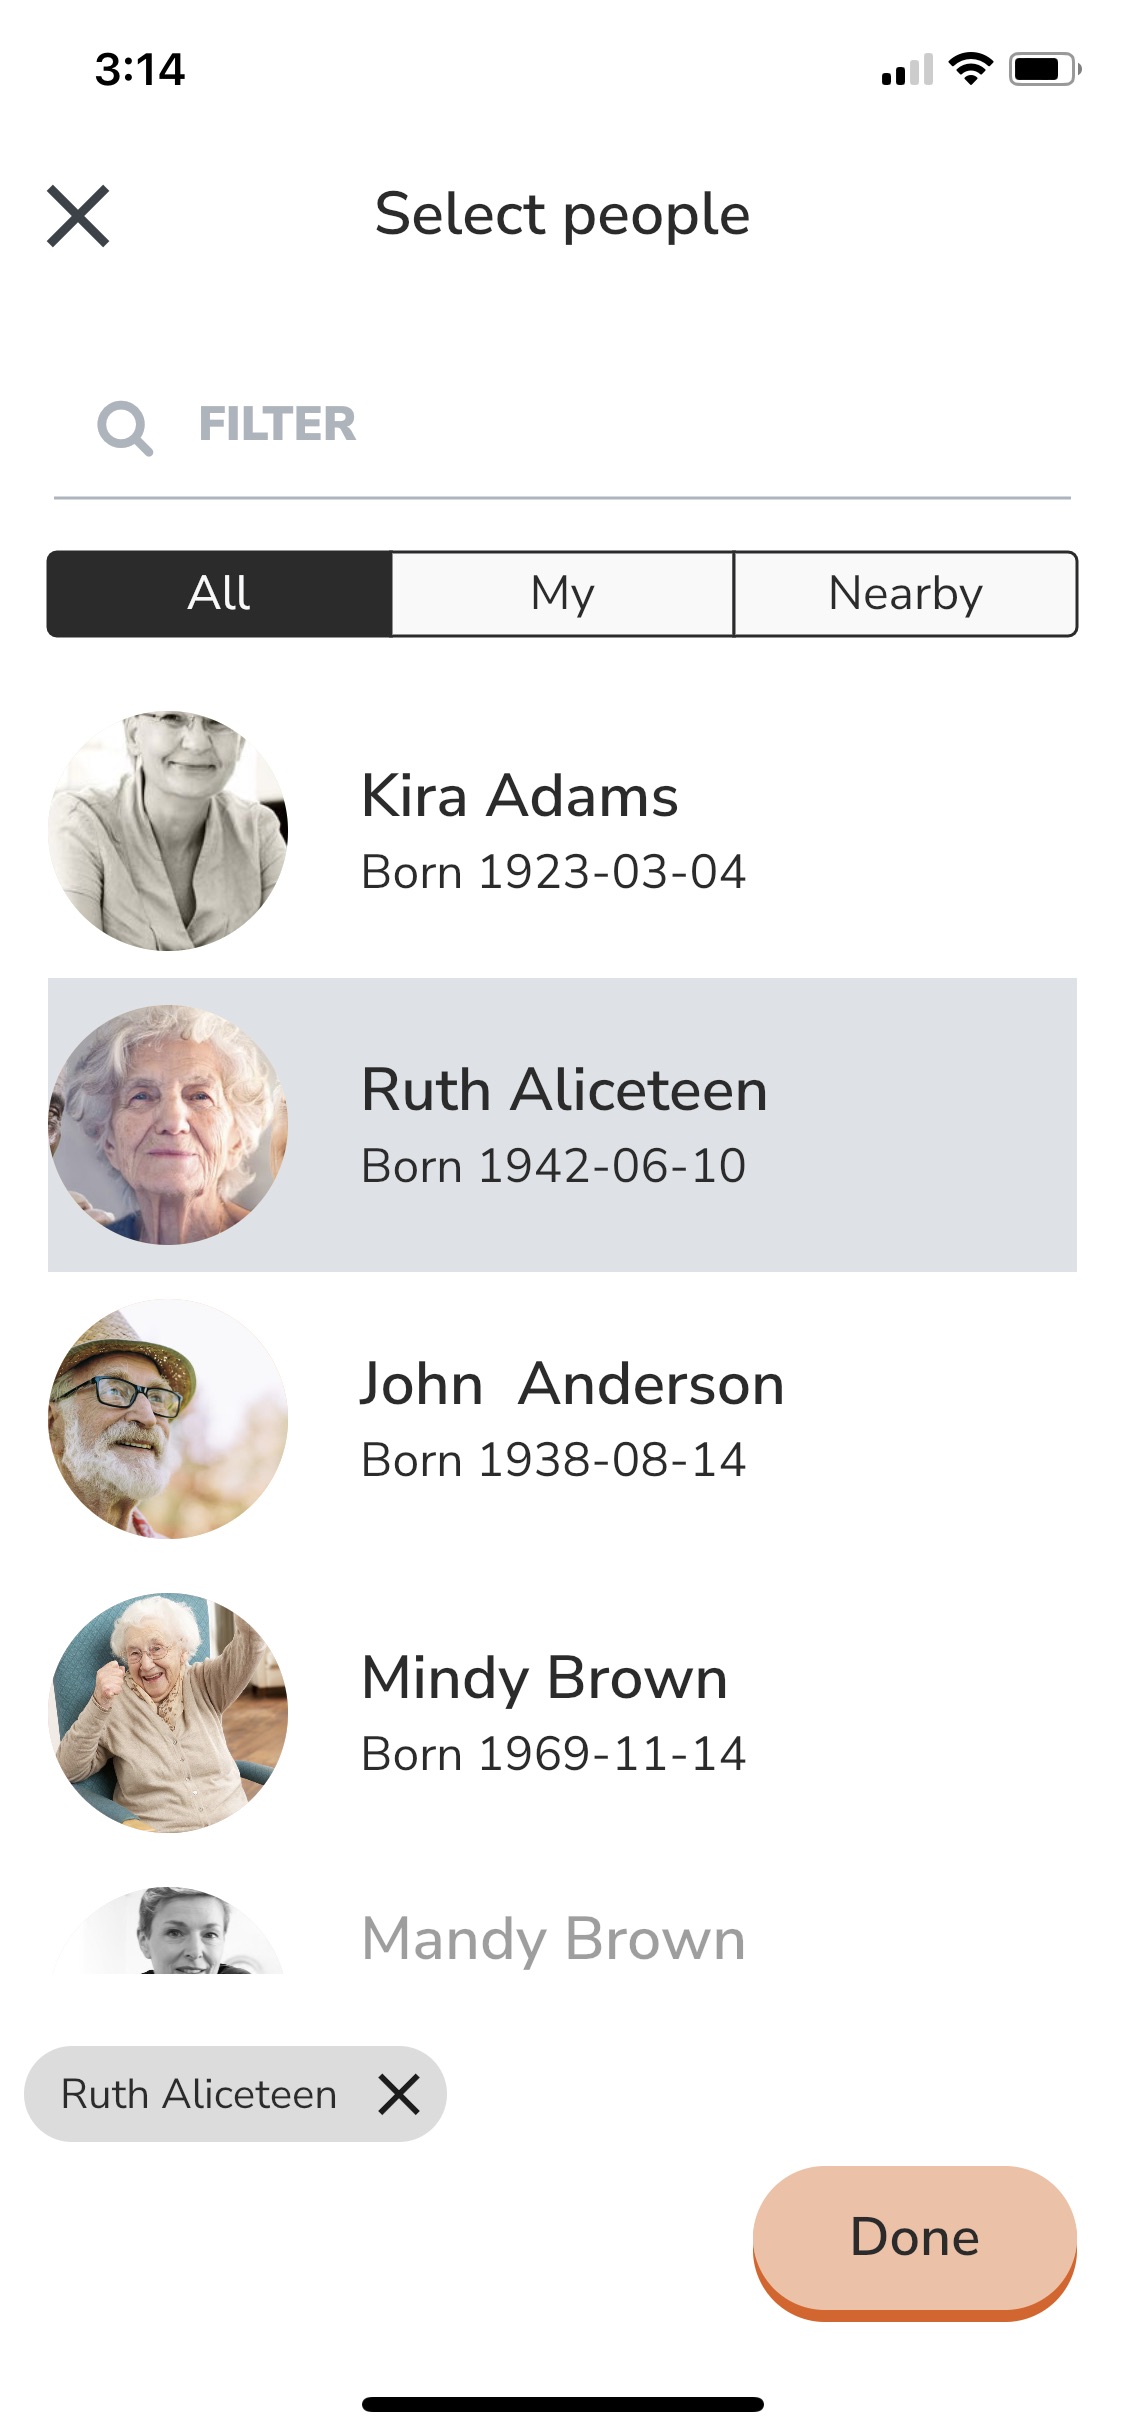
- Once you have selected the customer tap 'Done' down the bottom right of the screen.

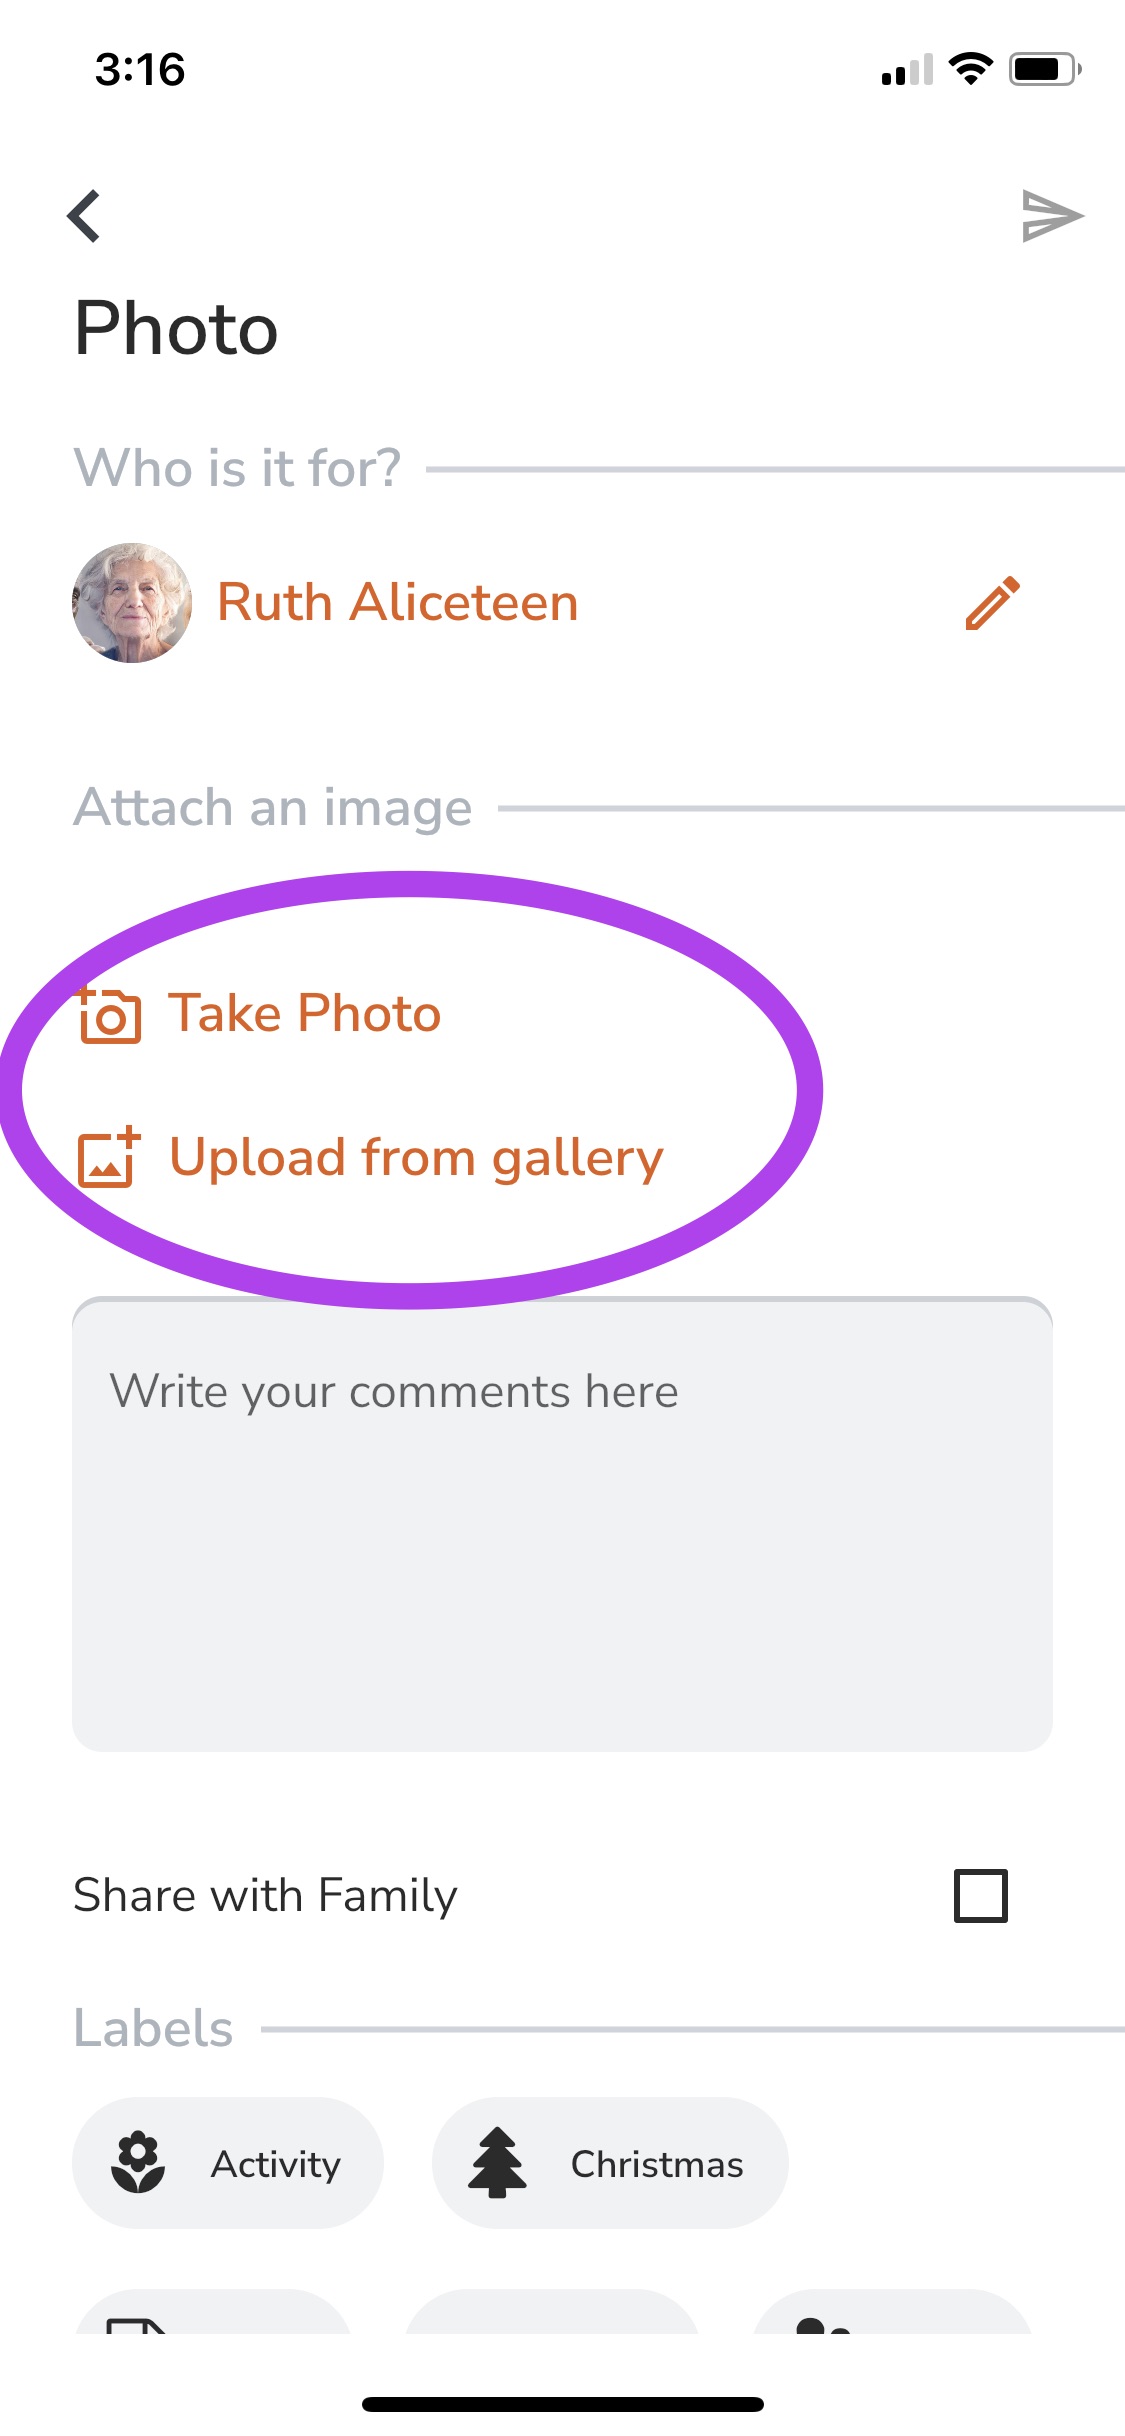
- Now you can choose to take a live photo with the camera on your mobile device by pressing 'Take Photo' or you can upload a photo from the gallery on your device by tapping 'Upload From Gallery'.
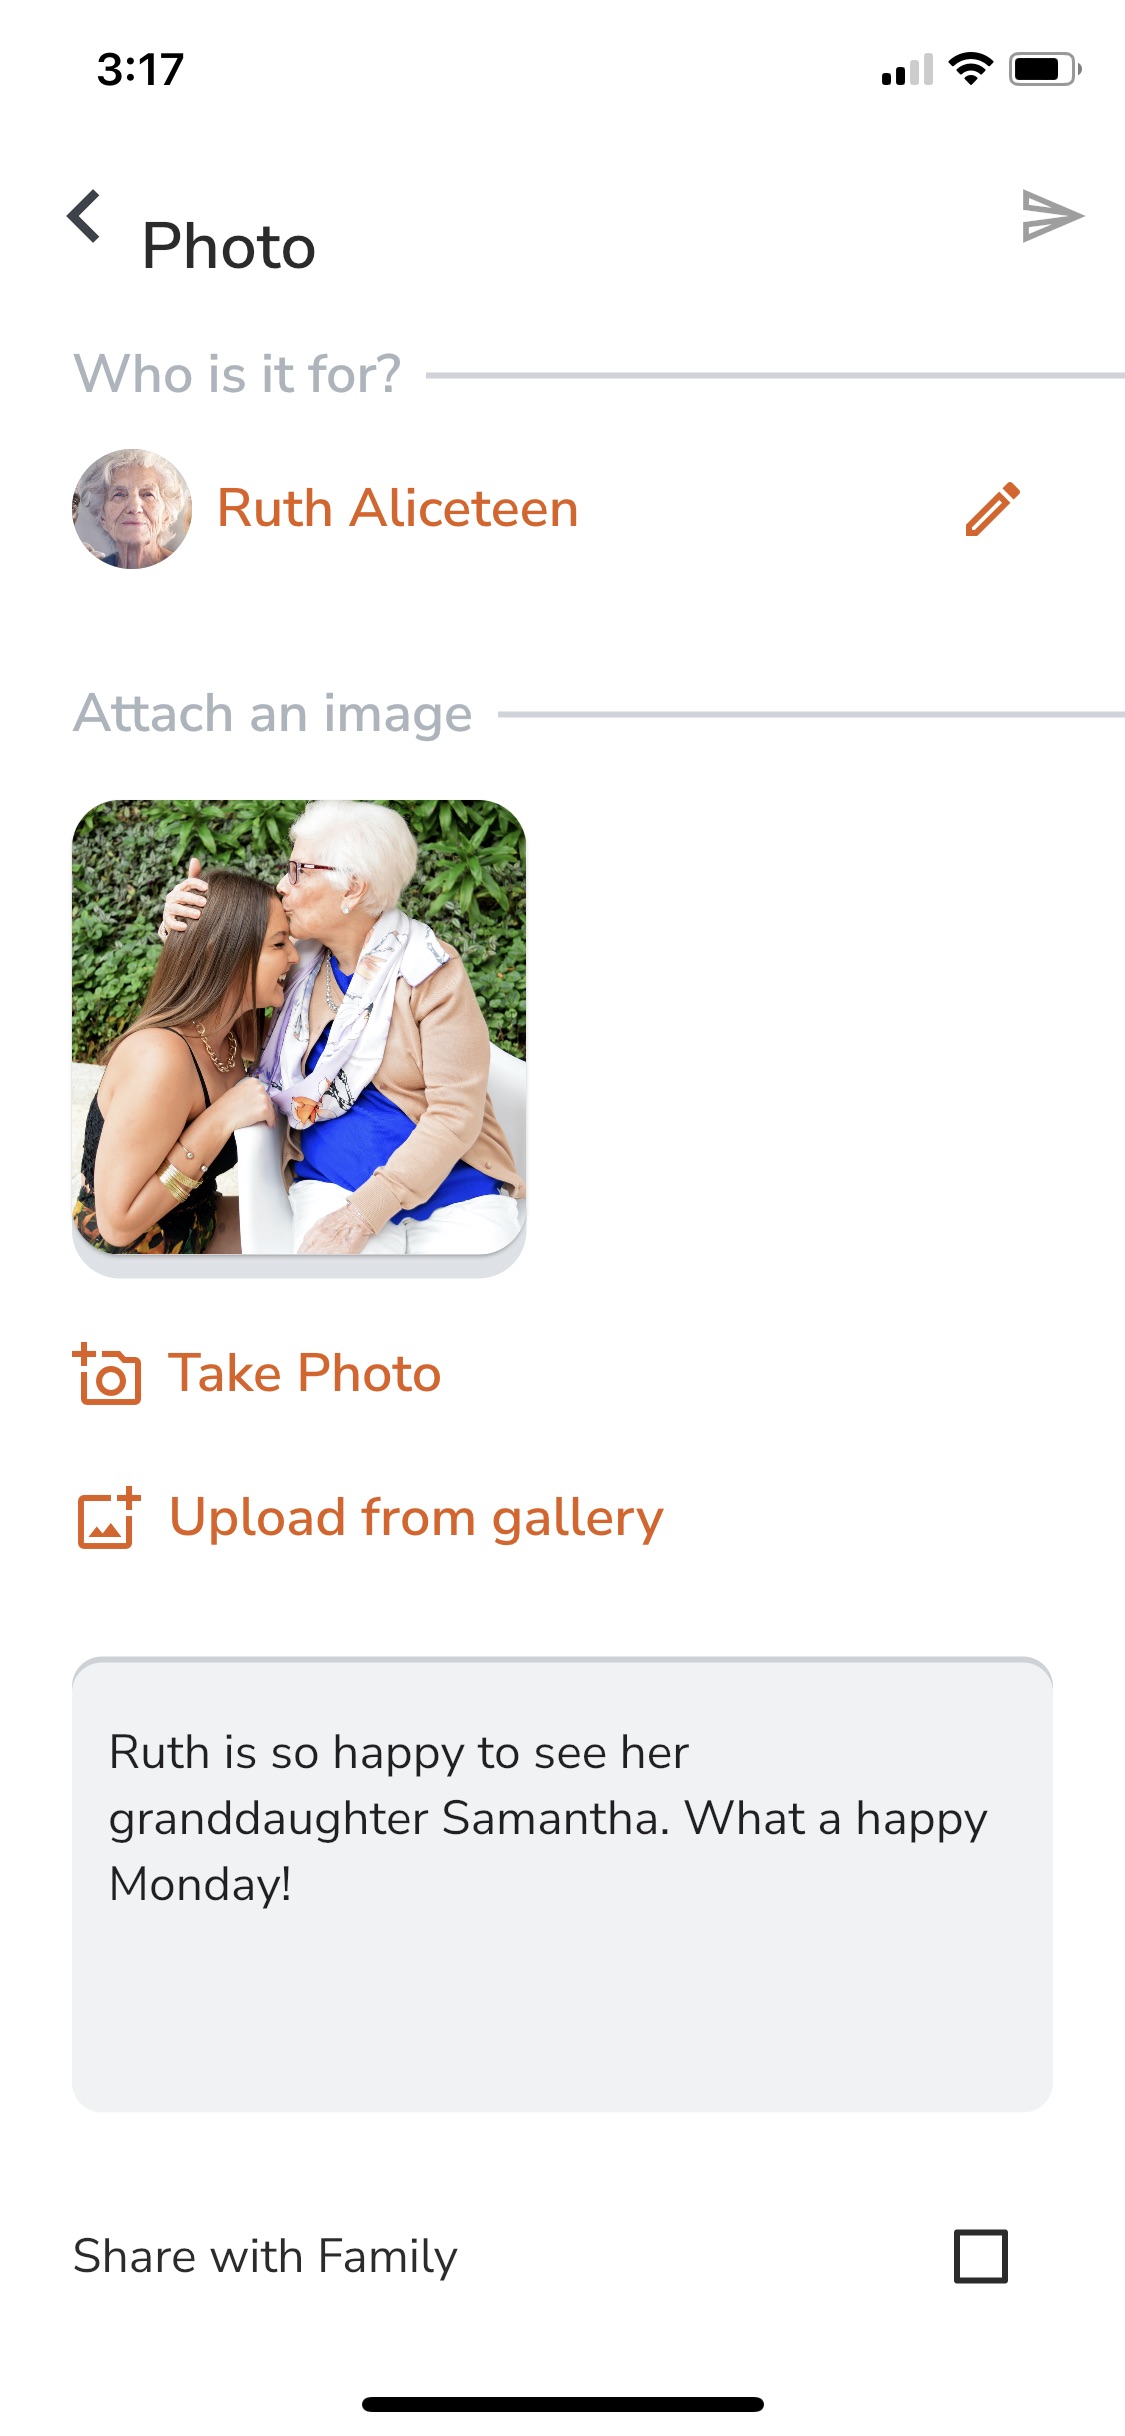
- Write a message in the comment box to attach to the photo post.
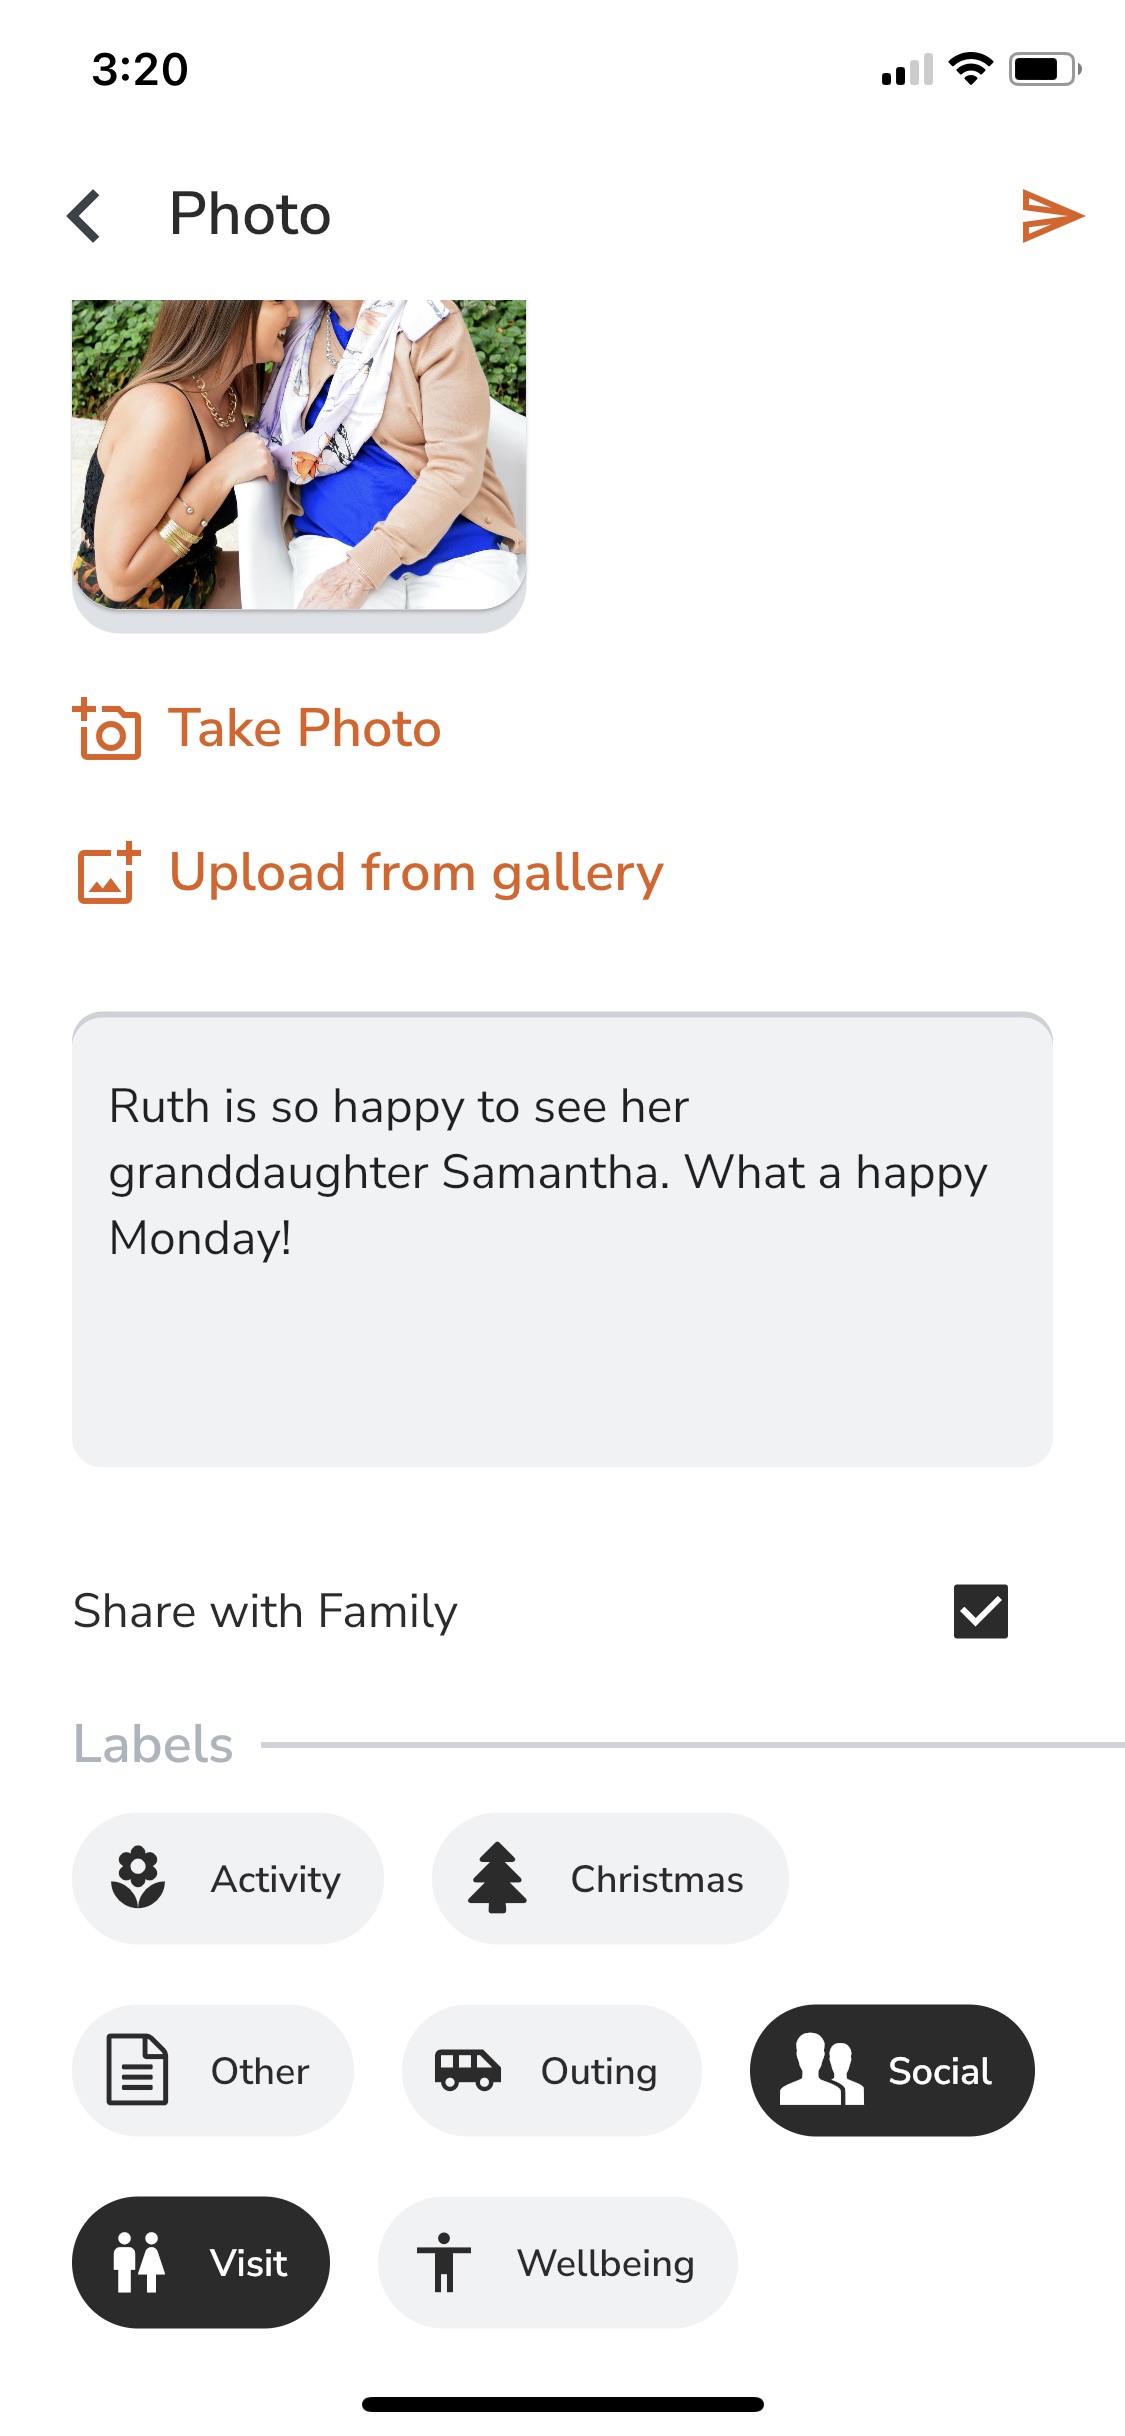
- If you are an Administrator or Coordinator you will have the option to 'Share with Family'. If you are a Team member you will not have this option. Your post will be approved by an Administrator or Coordinator before being shared with family.

- Choose a label that best describes what is happening in the photo.
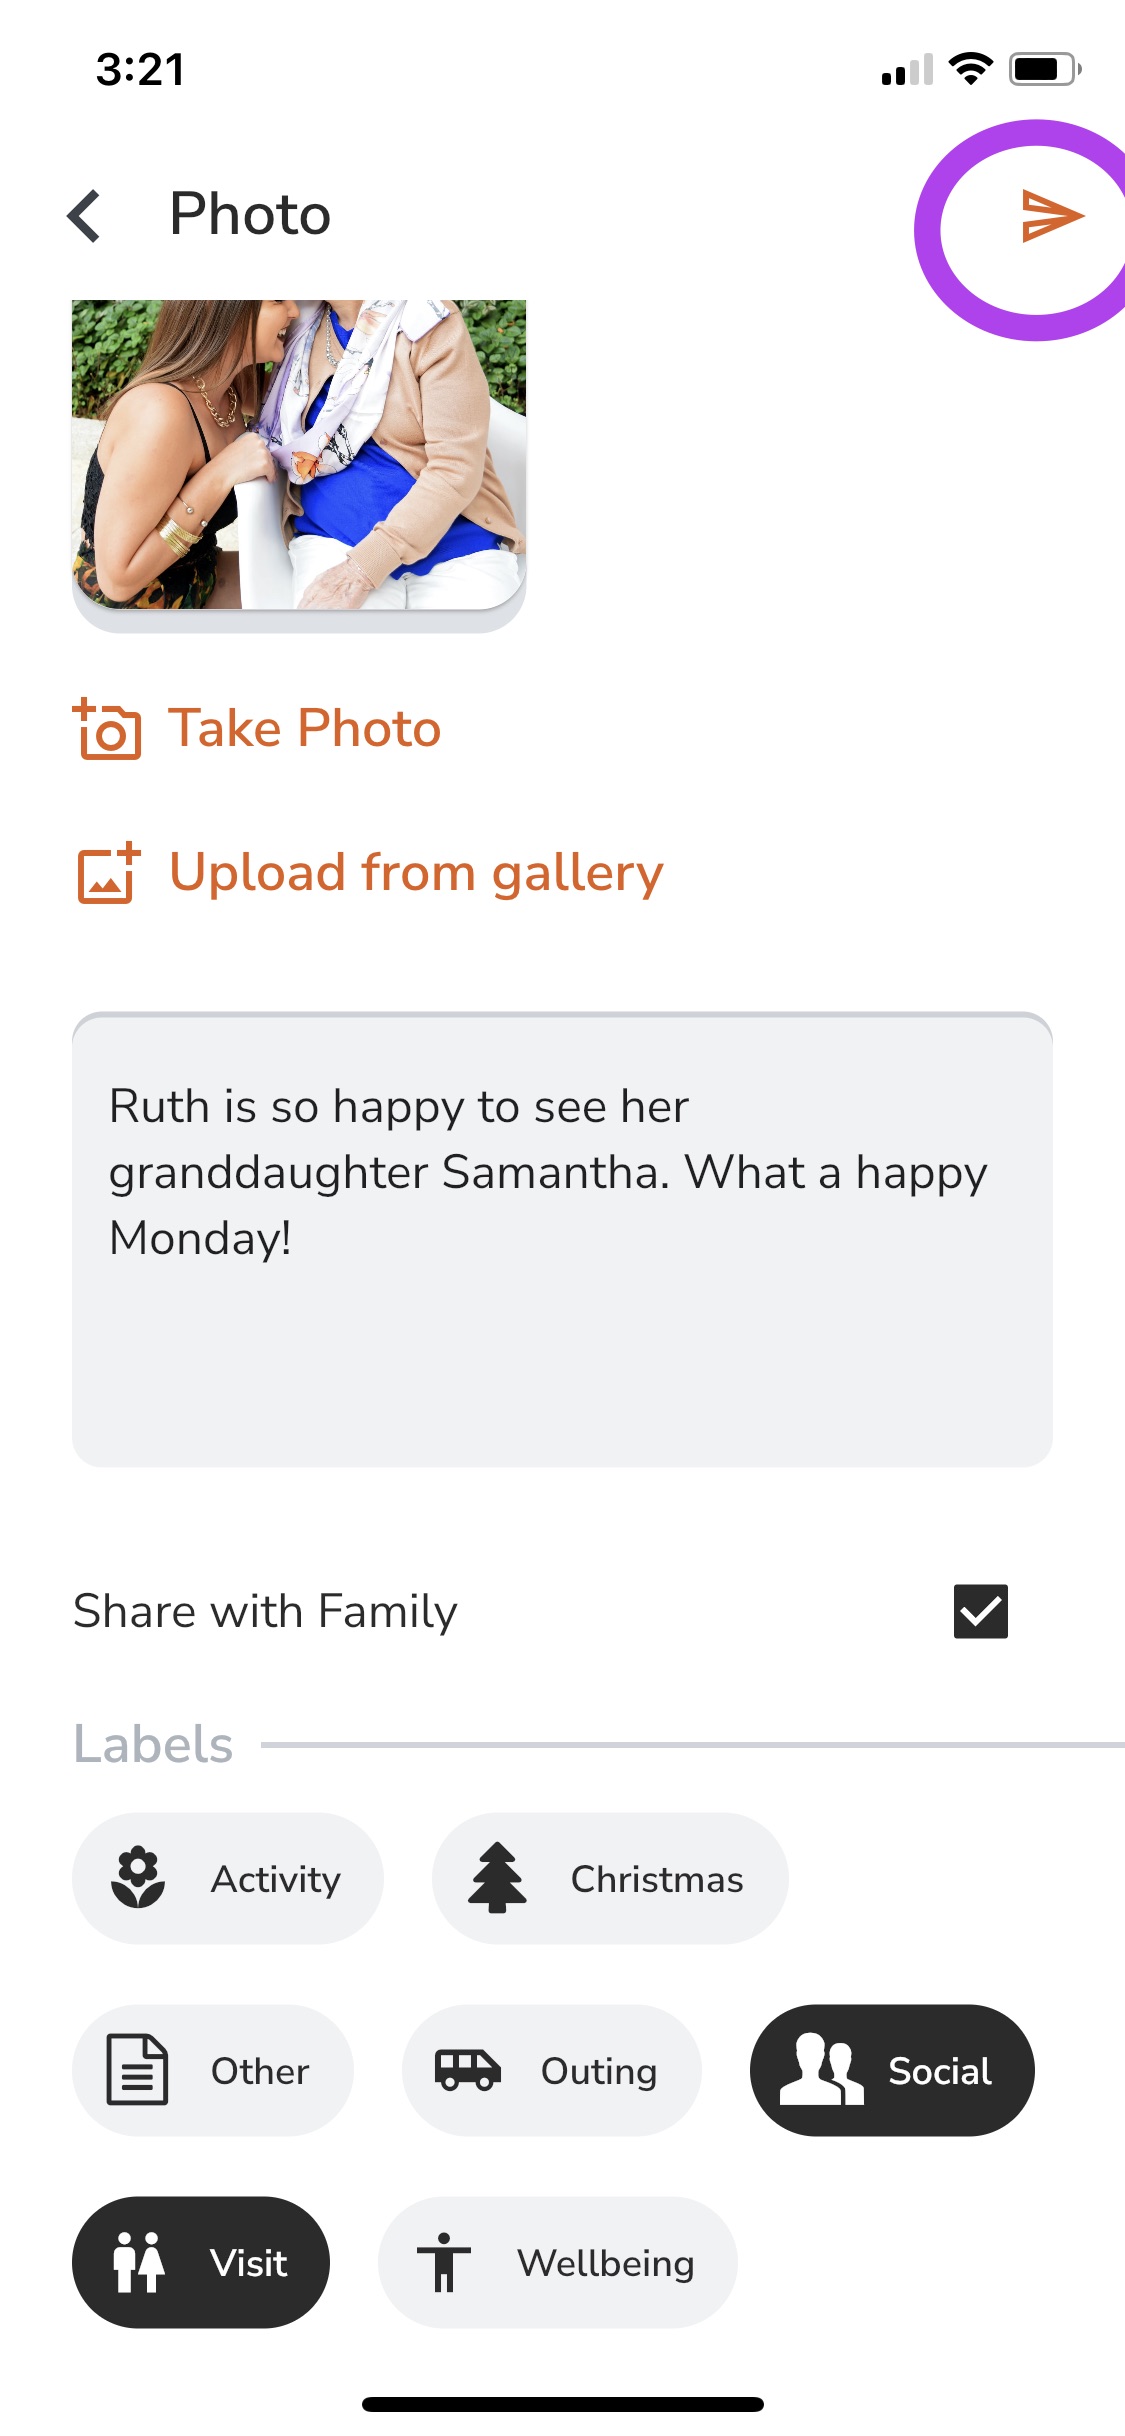
- Once you are happy, tap send up in the top right-hand corner of the screen.
Web
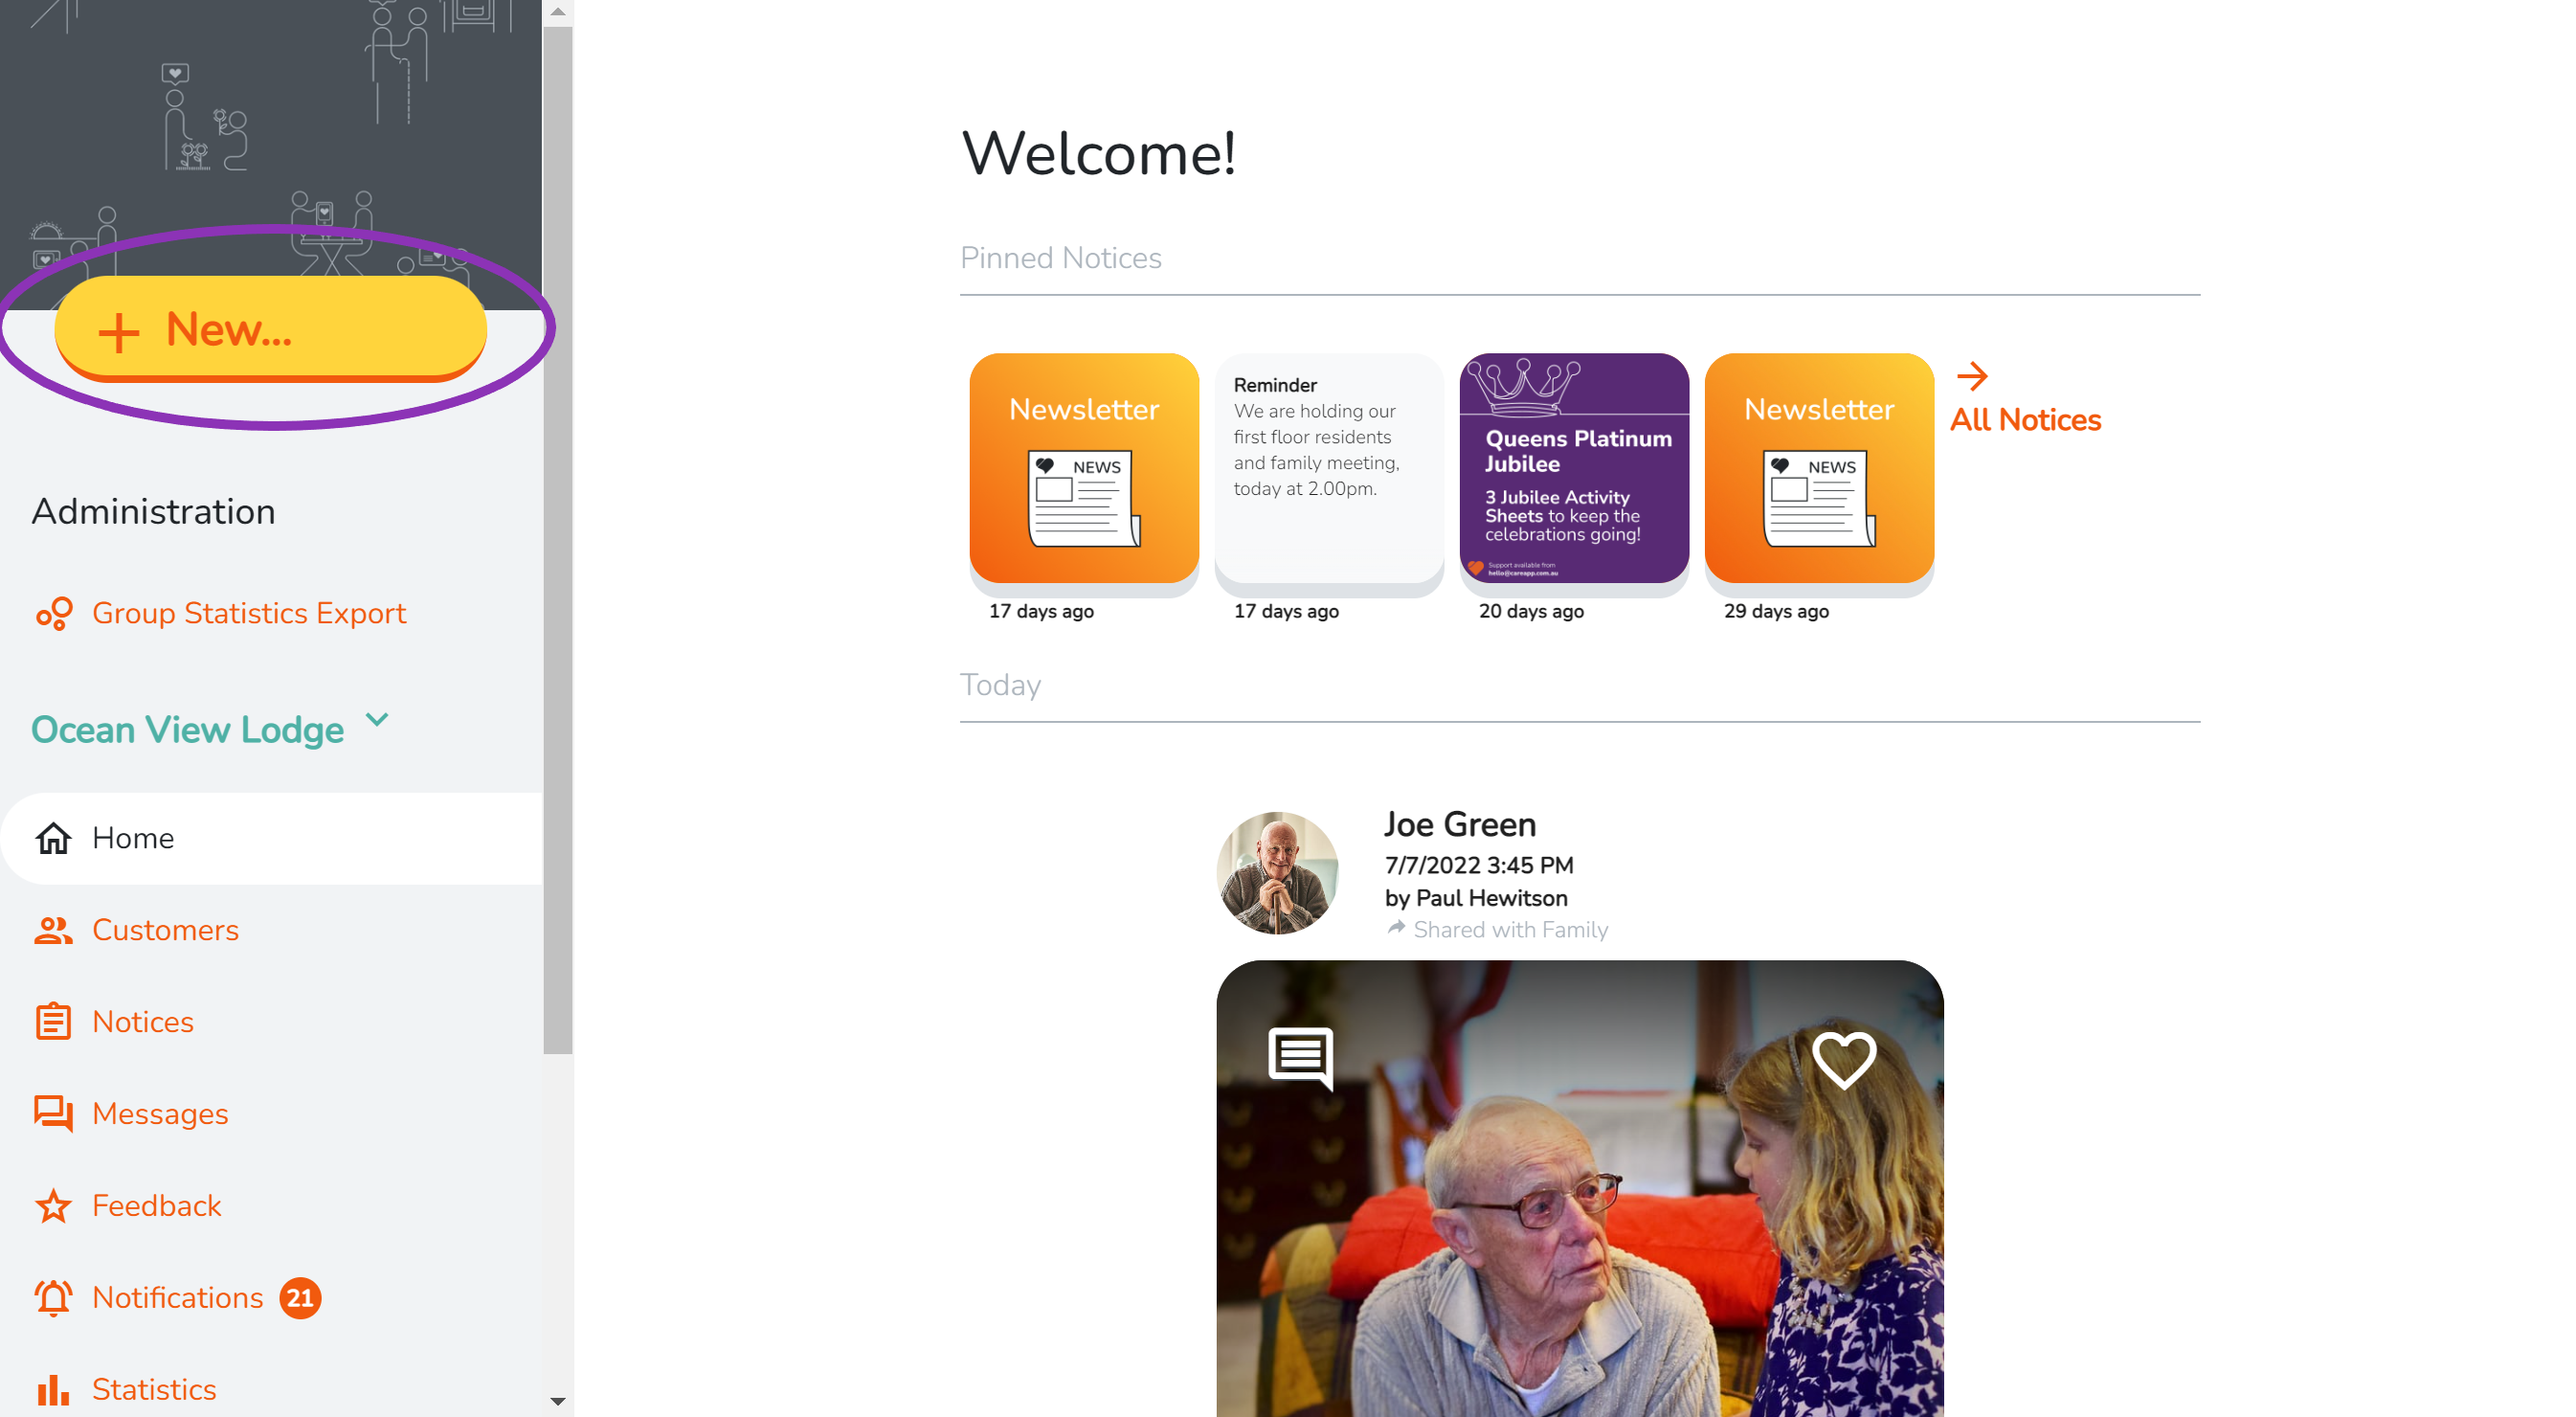
- Click on the big yellow +New button in the left side menu.
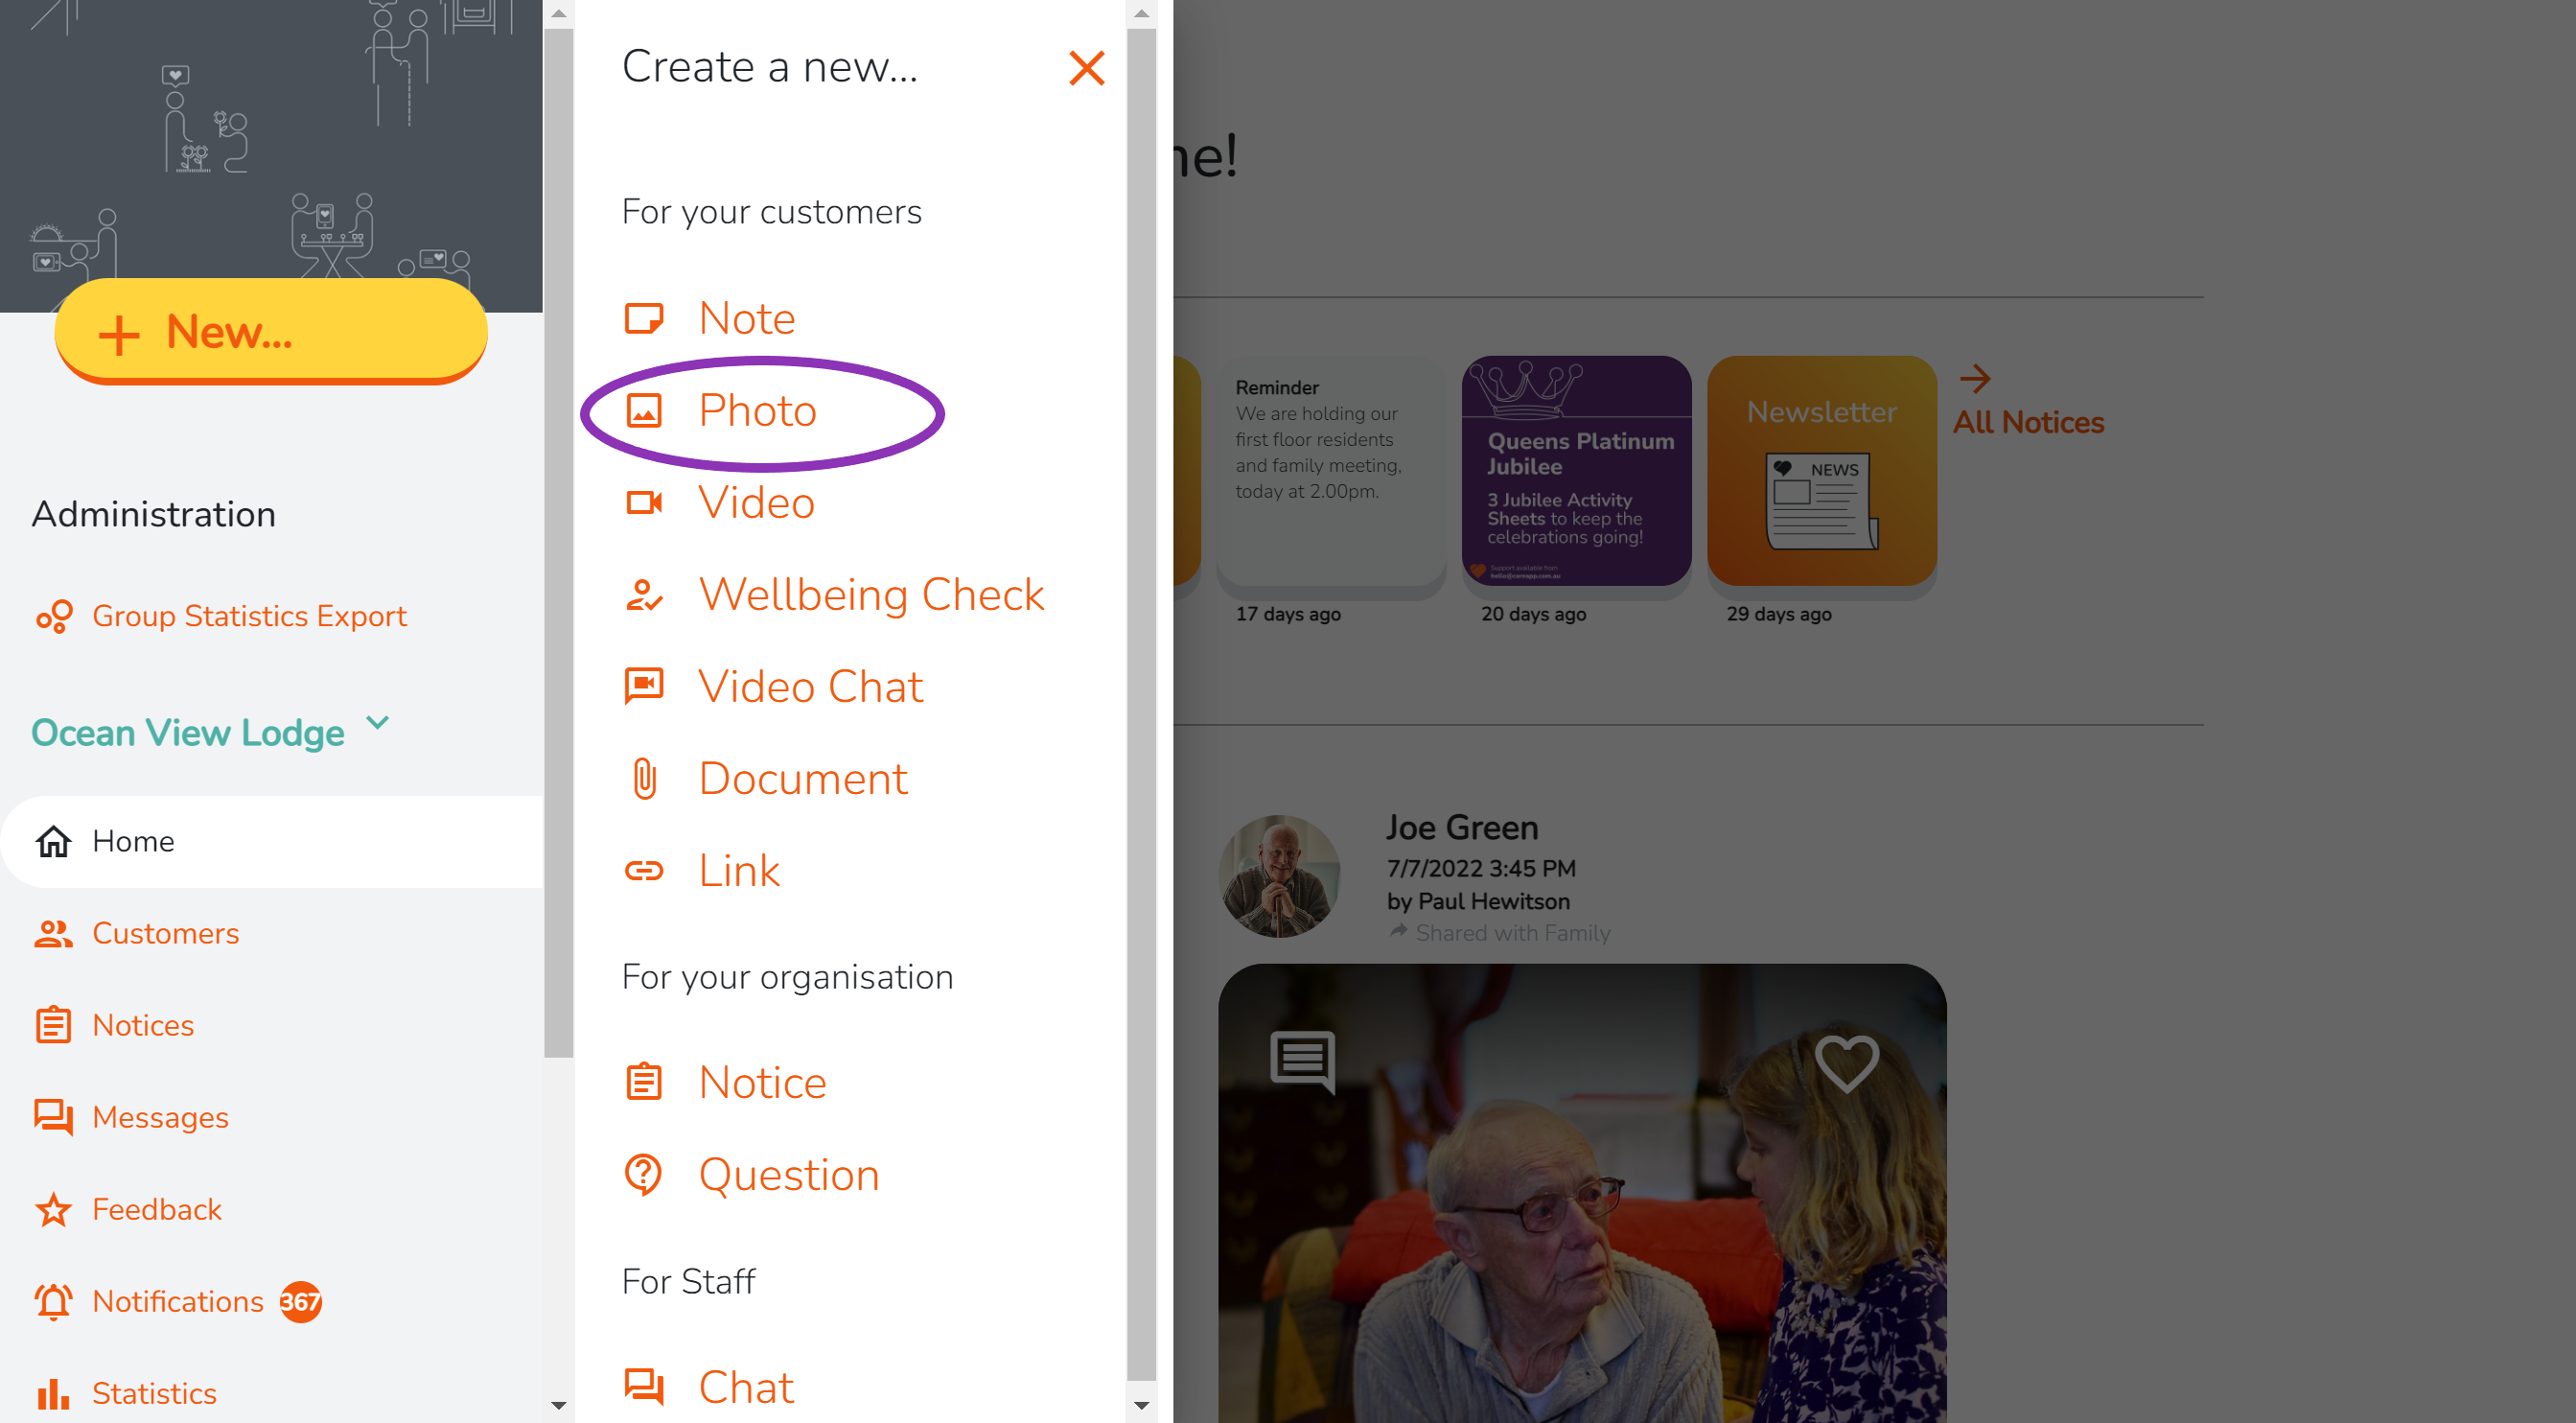
- Click on 'Photo' from the menu.
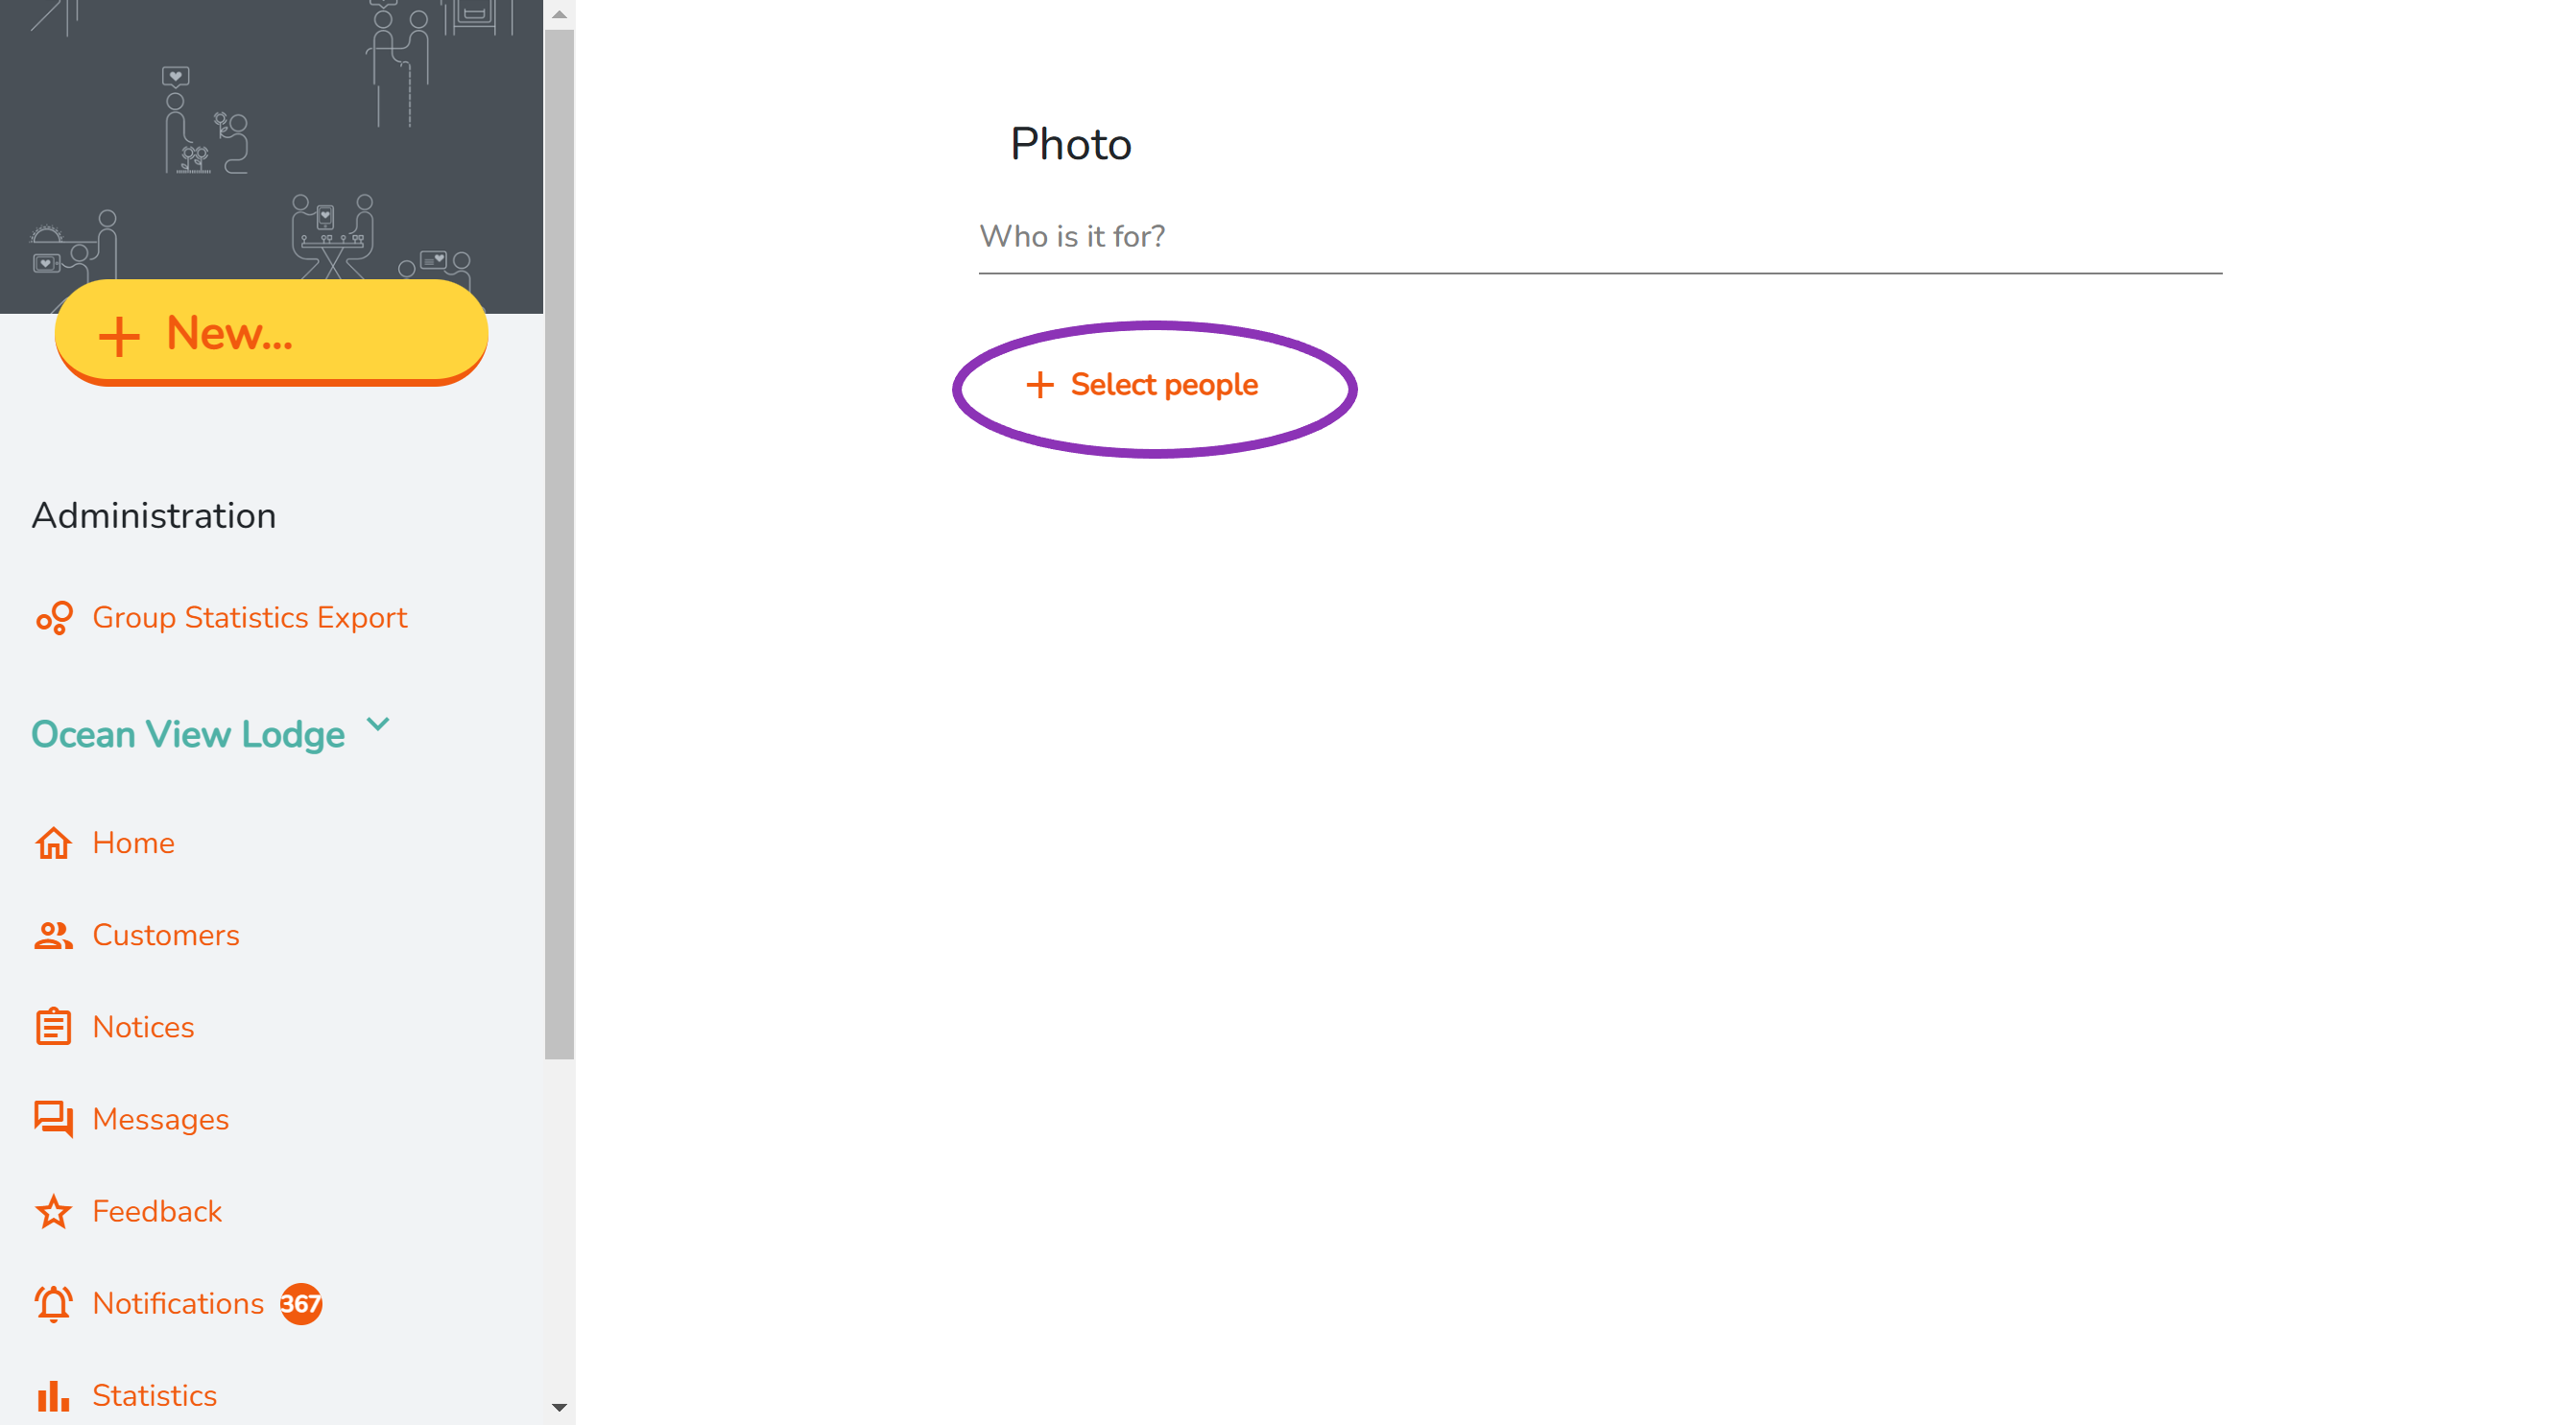
- Click 'Select people'.
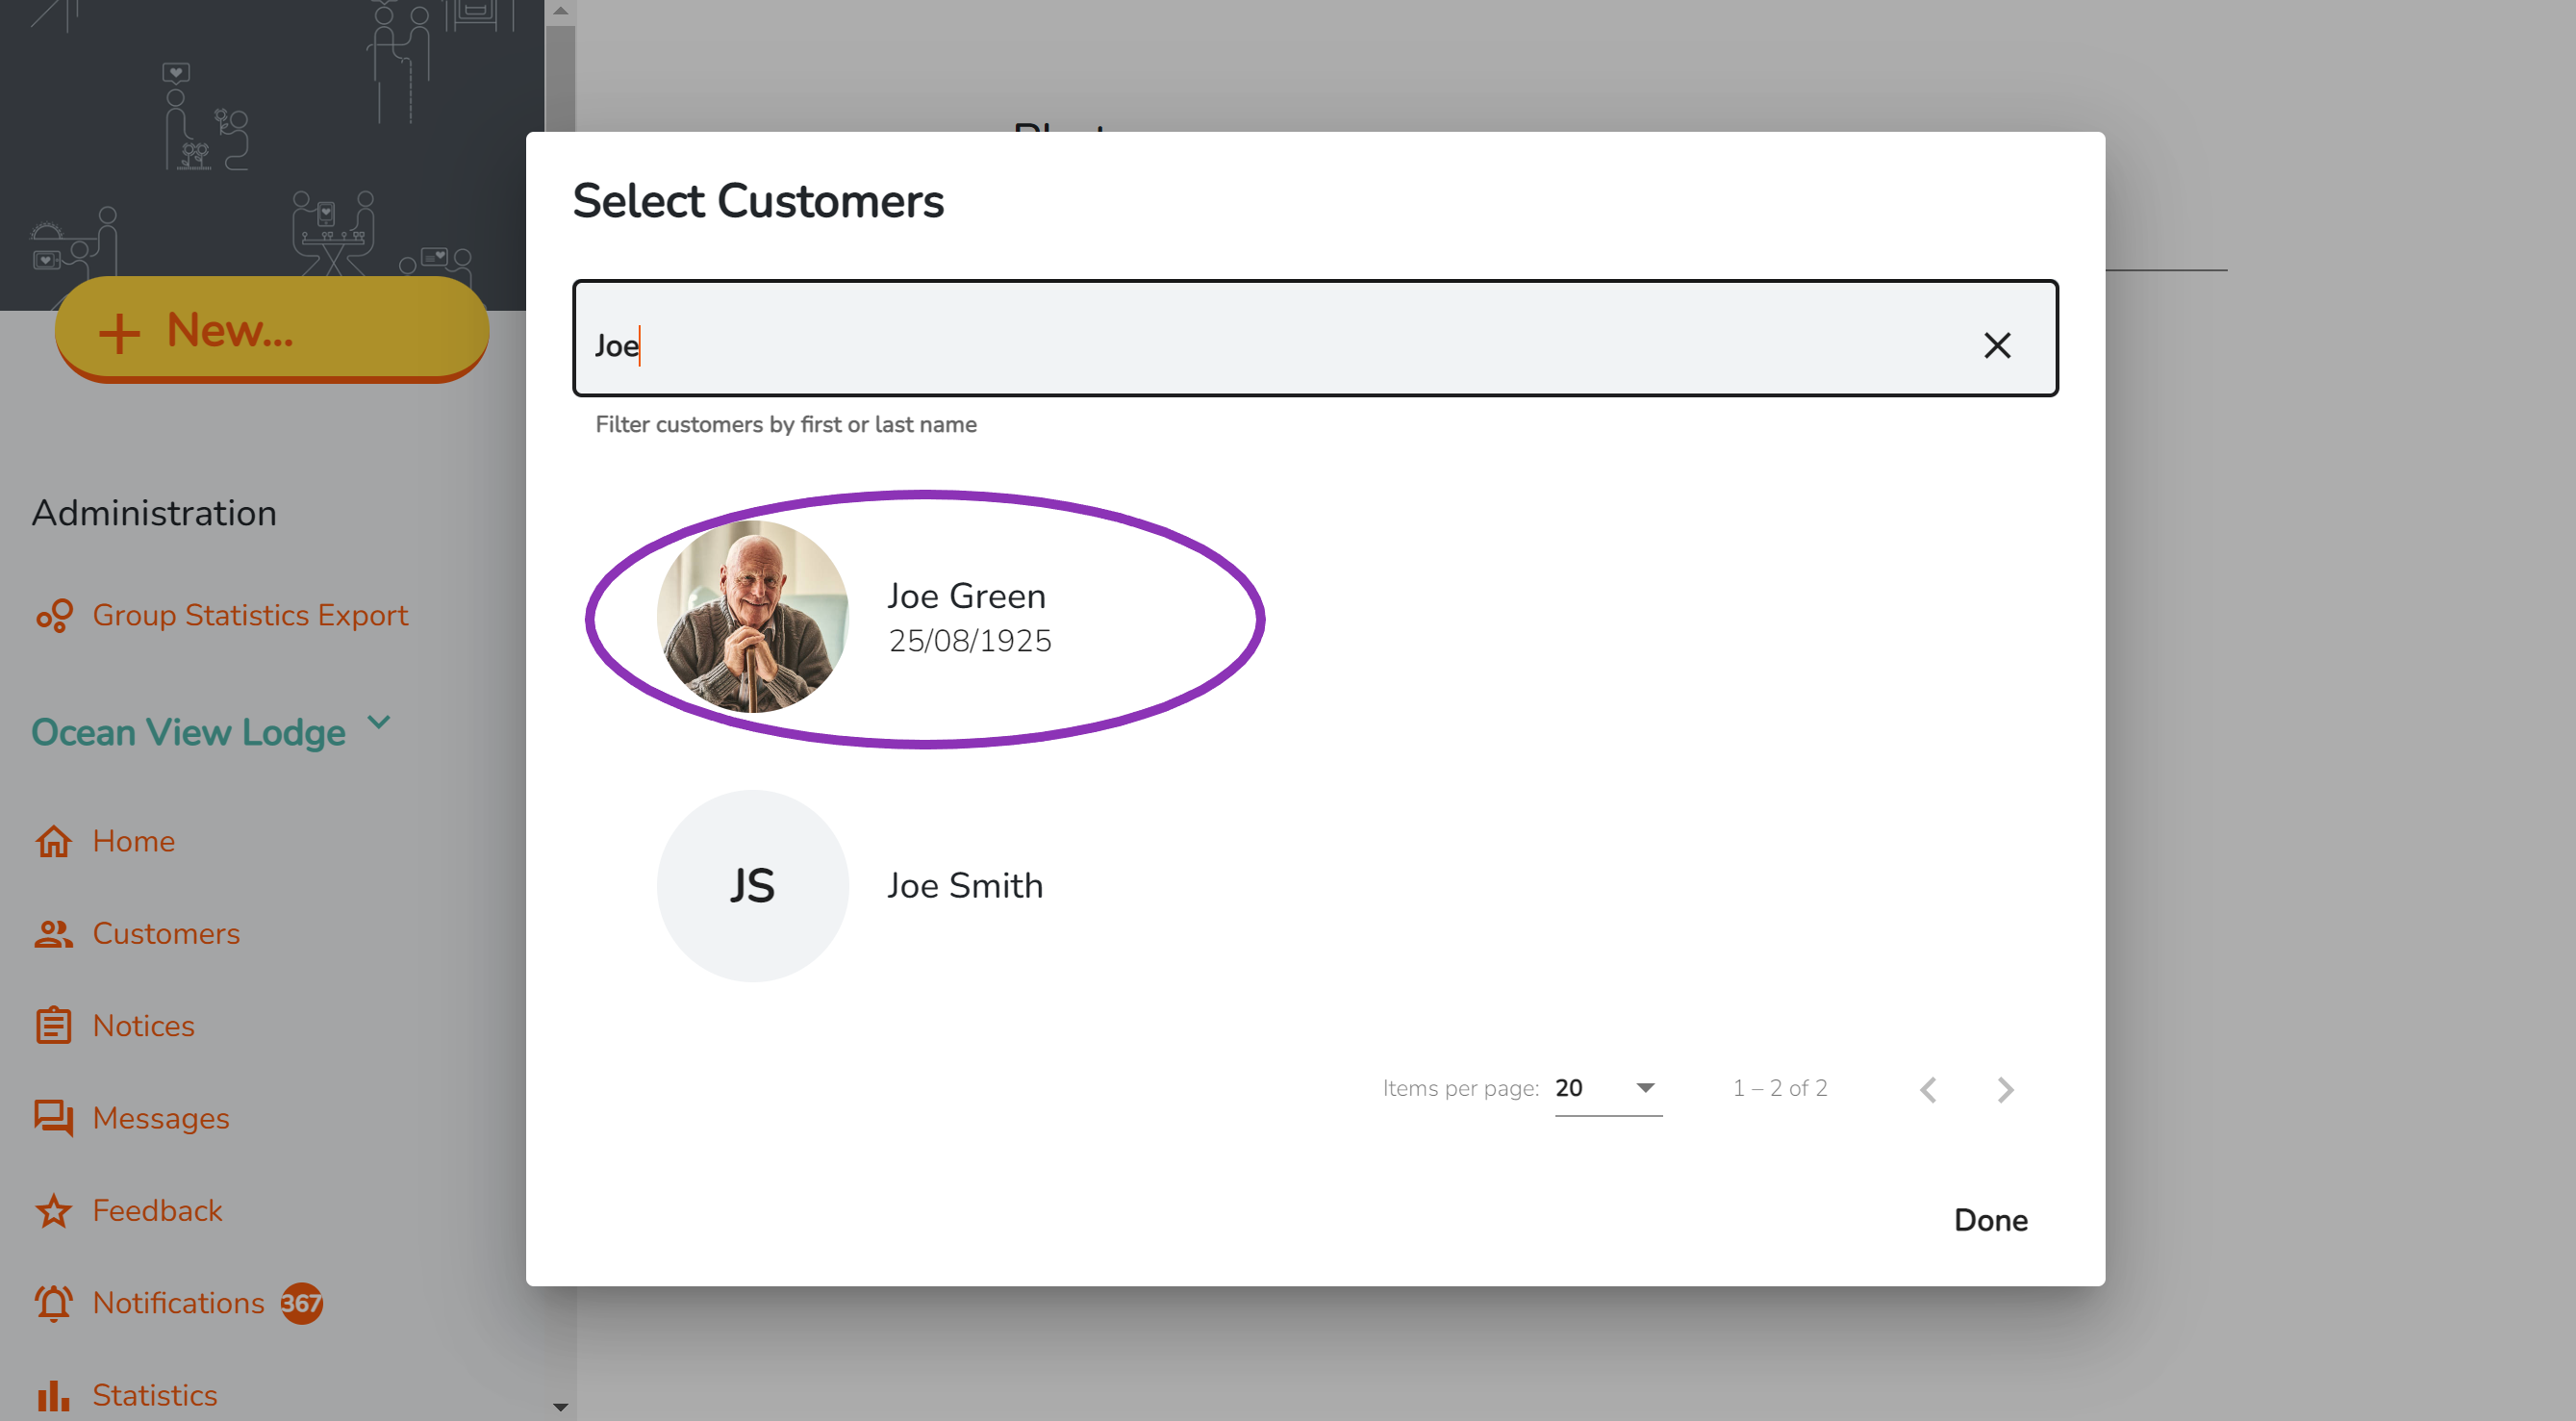
- Find the customer you wish to make a photo post for. Search for them by scrolling down the list or searching their name in the 'Filter' search bar.
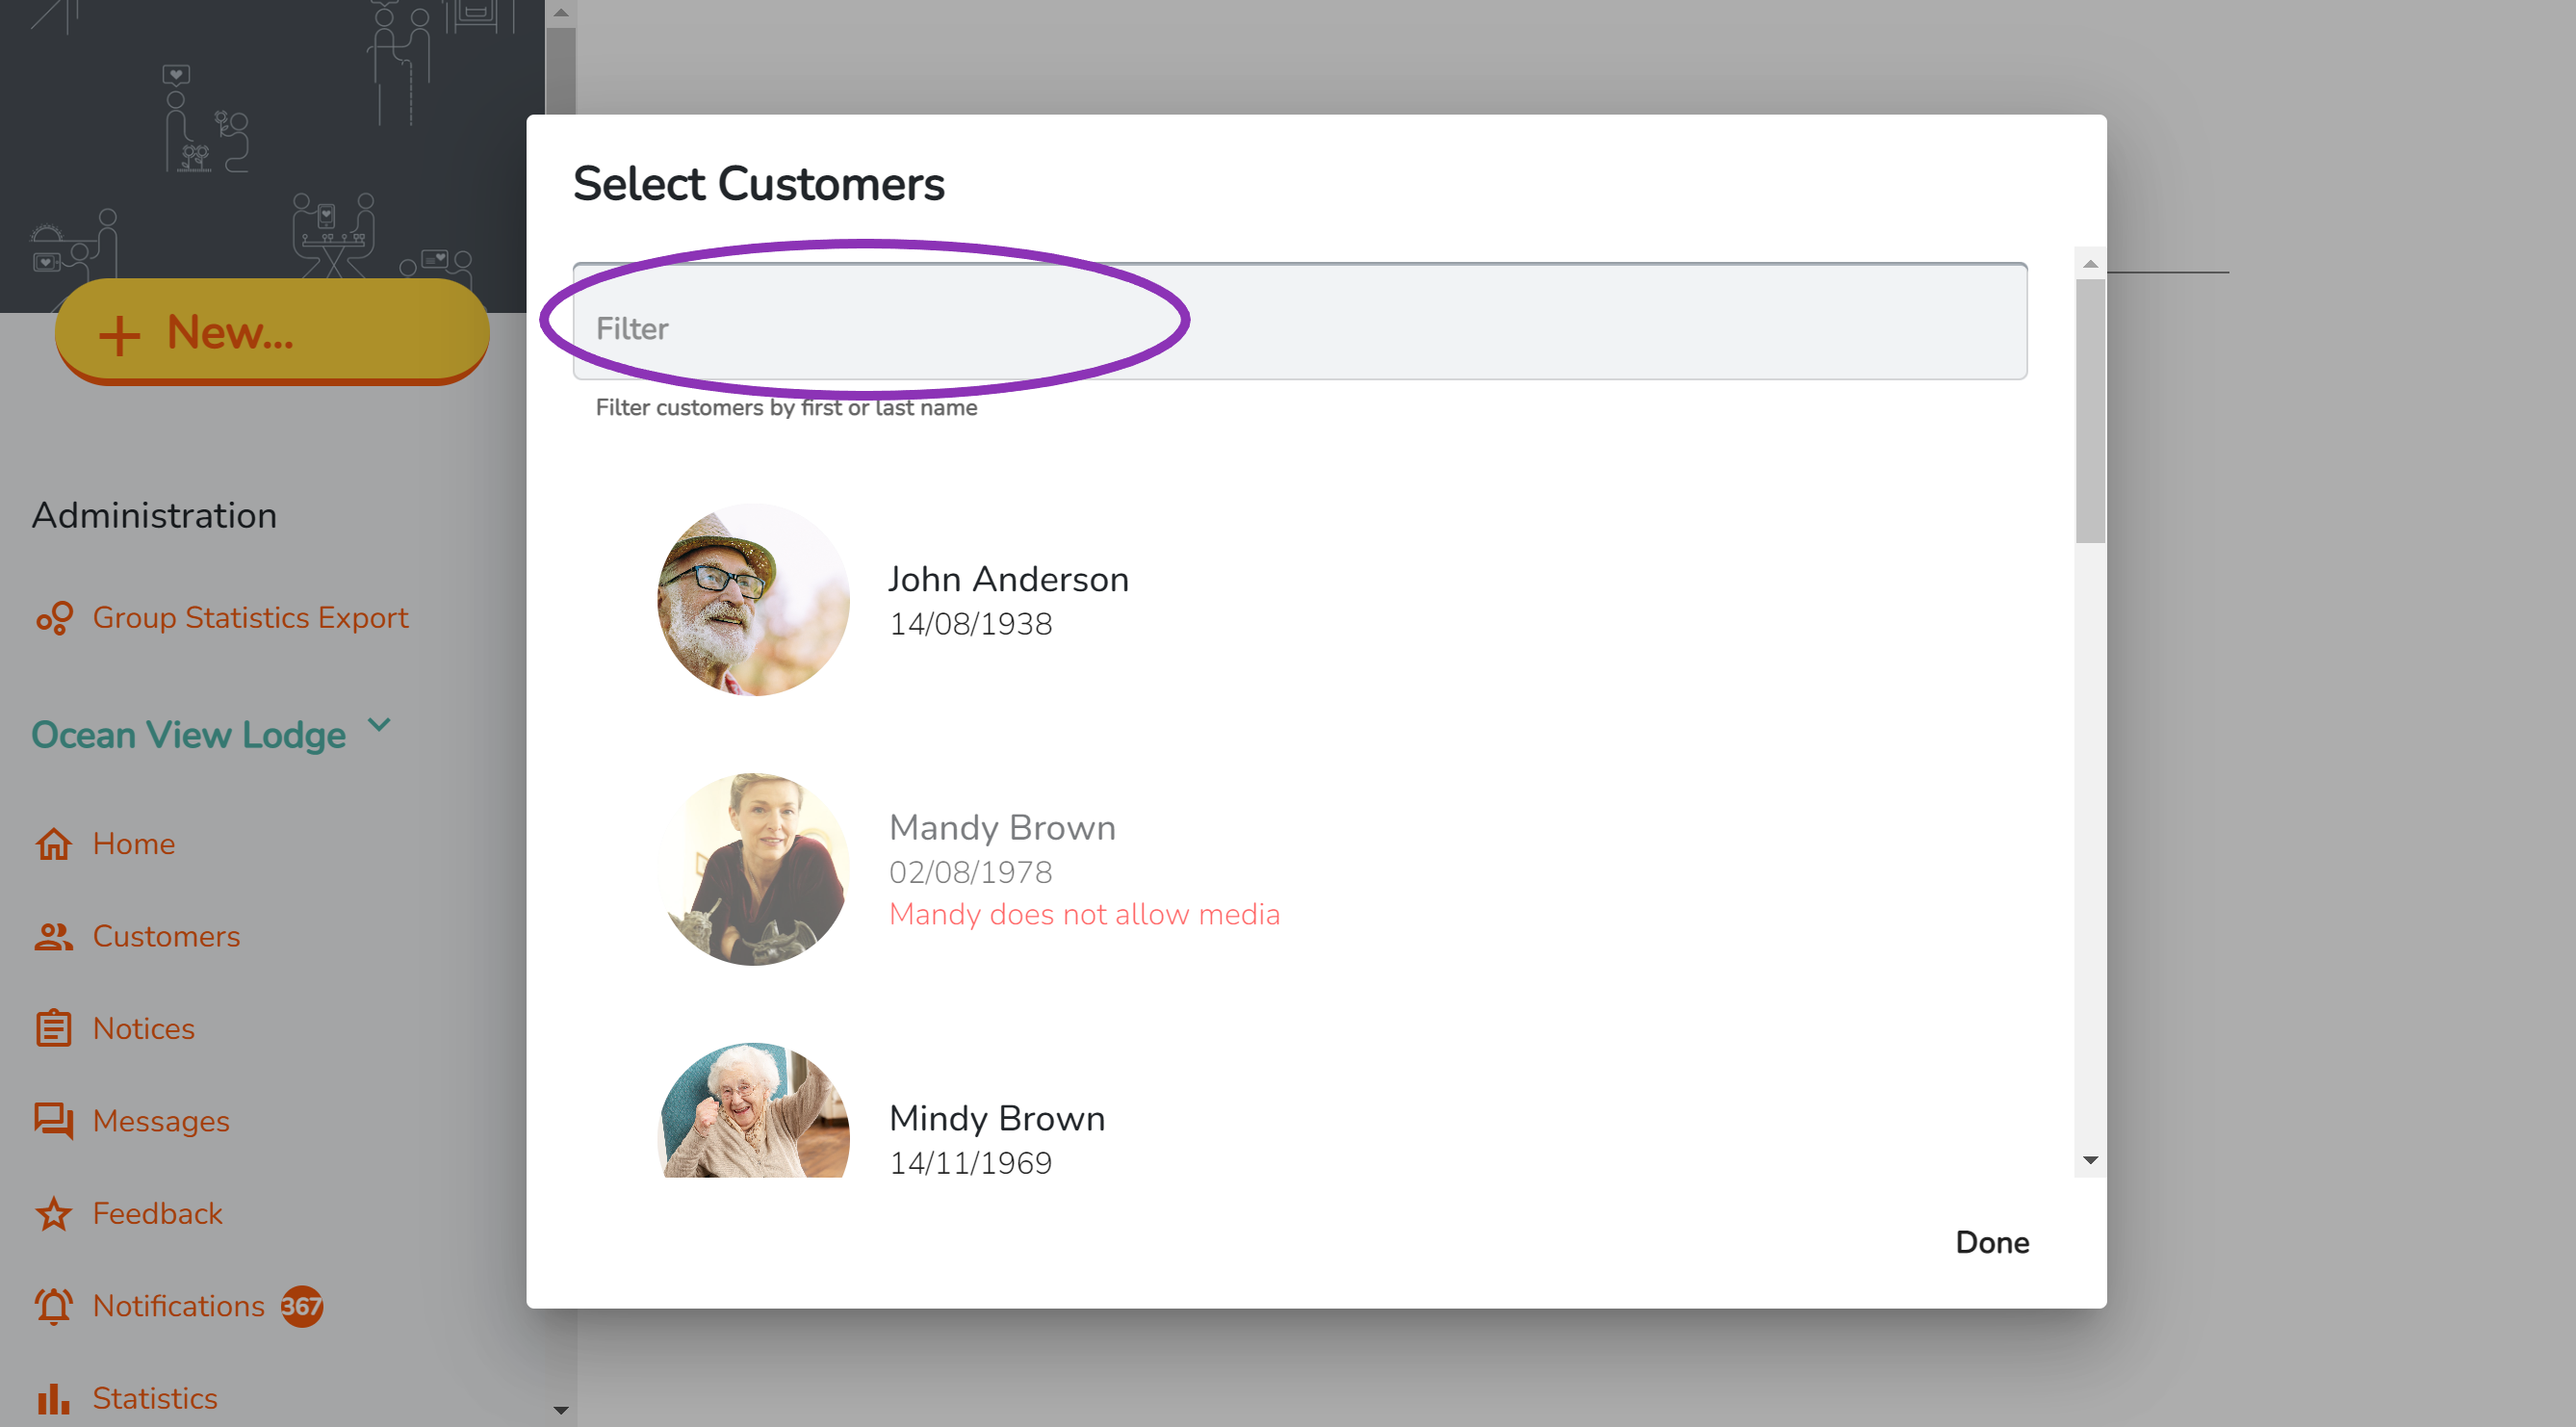
- Select the customer by clicking on their name. This will highlight them and add their name to the list at the bottom of the window. You can select one customer or you can select multiple.
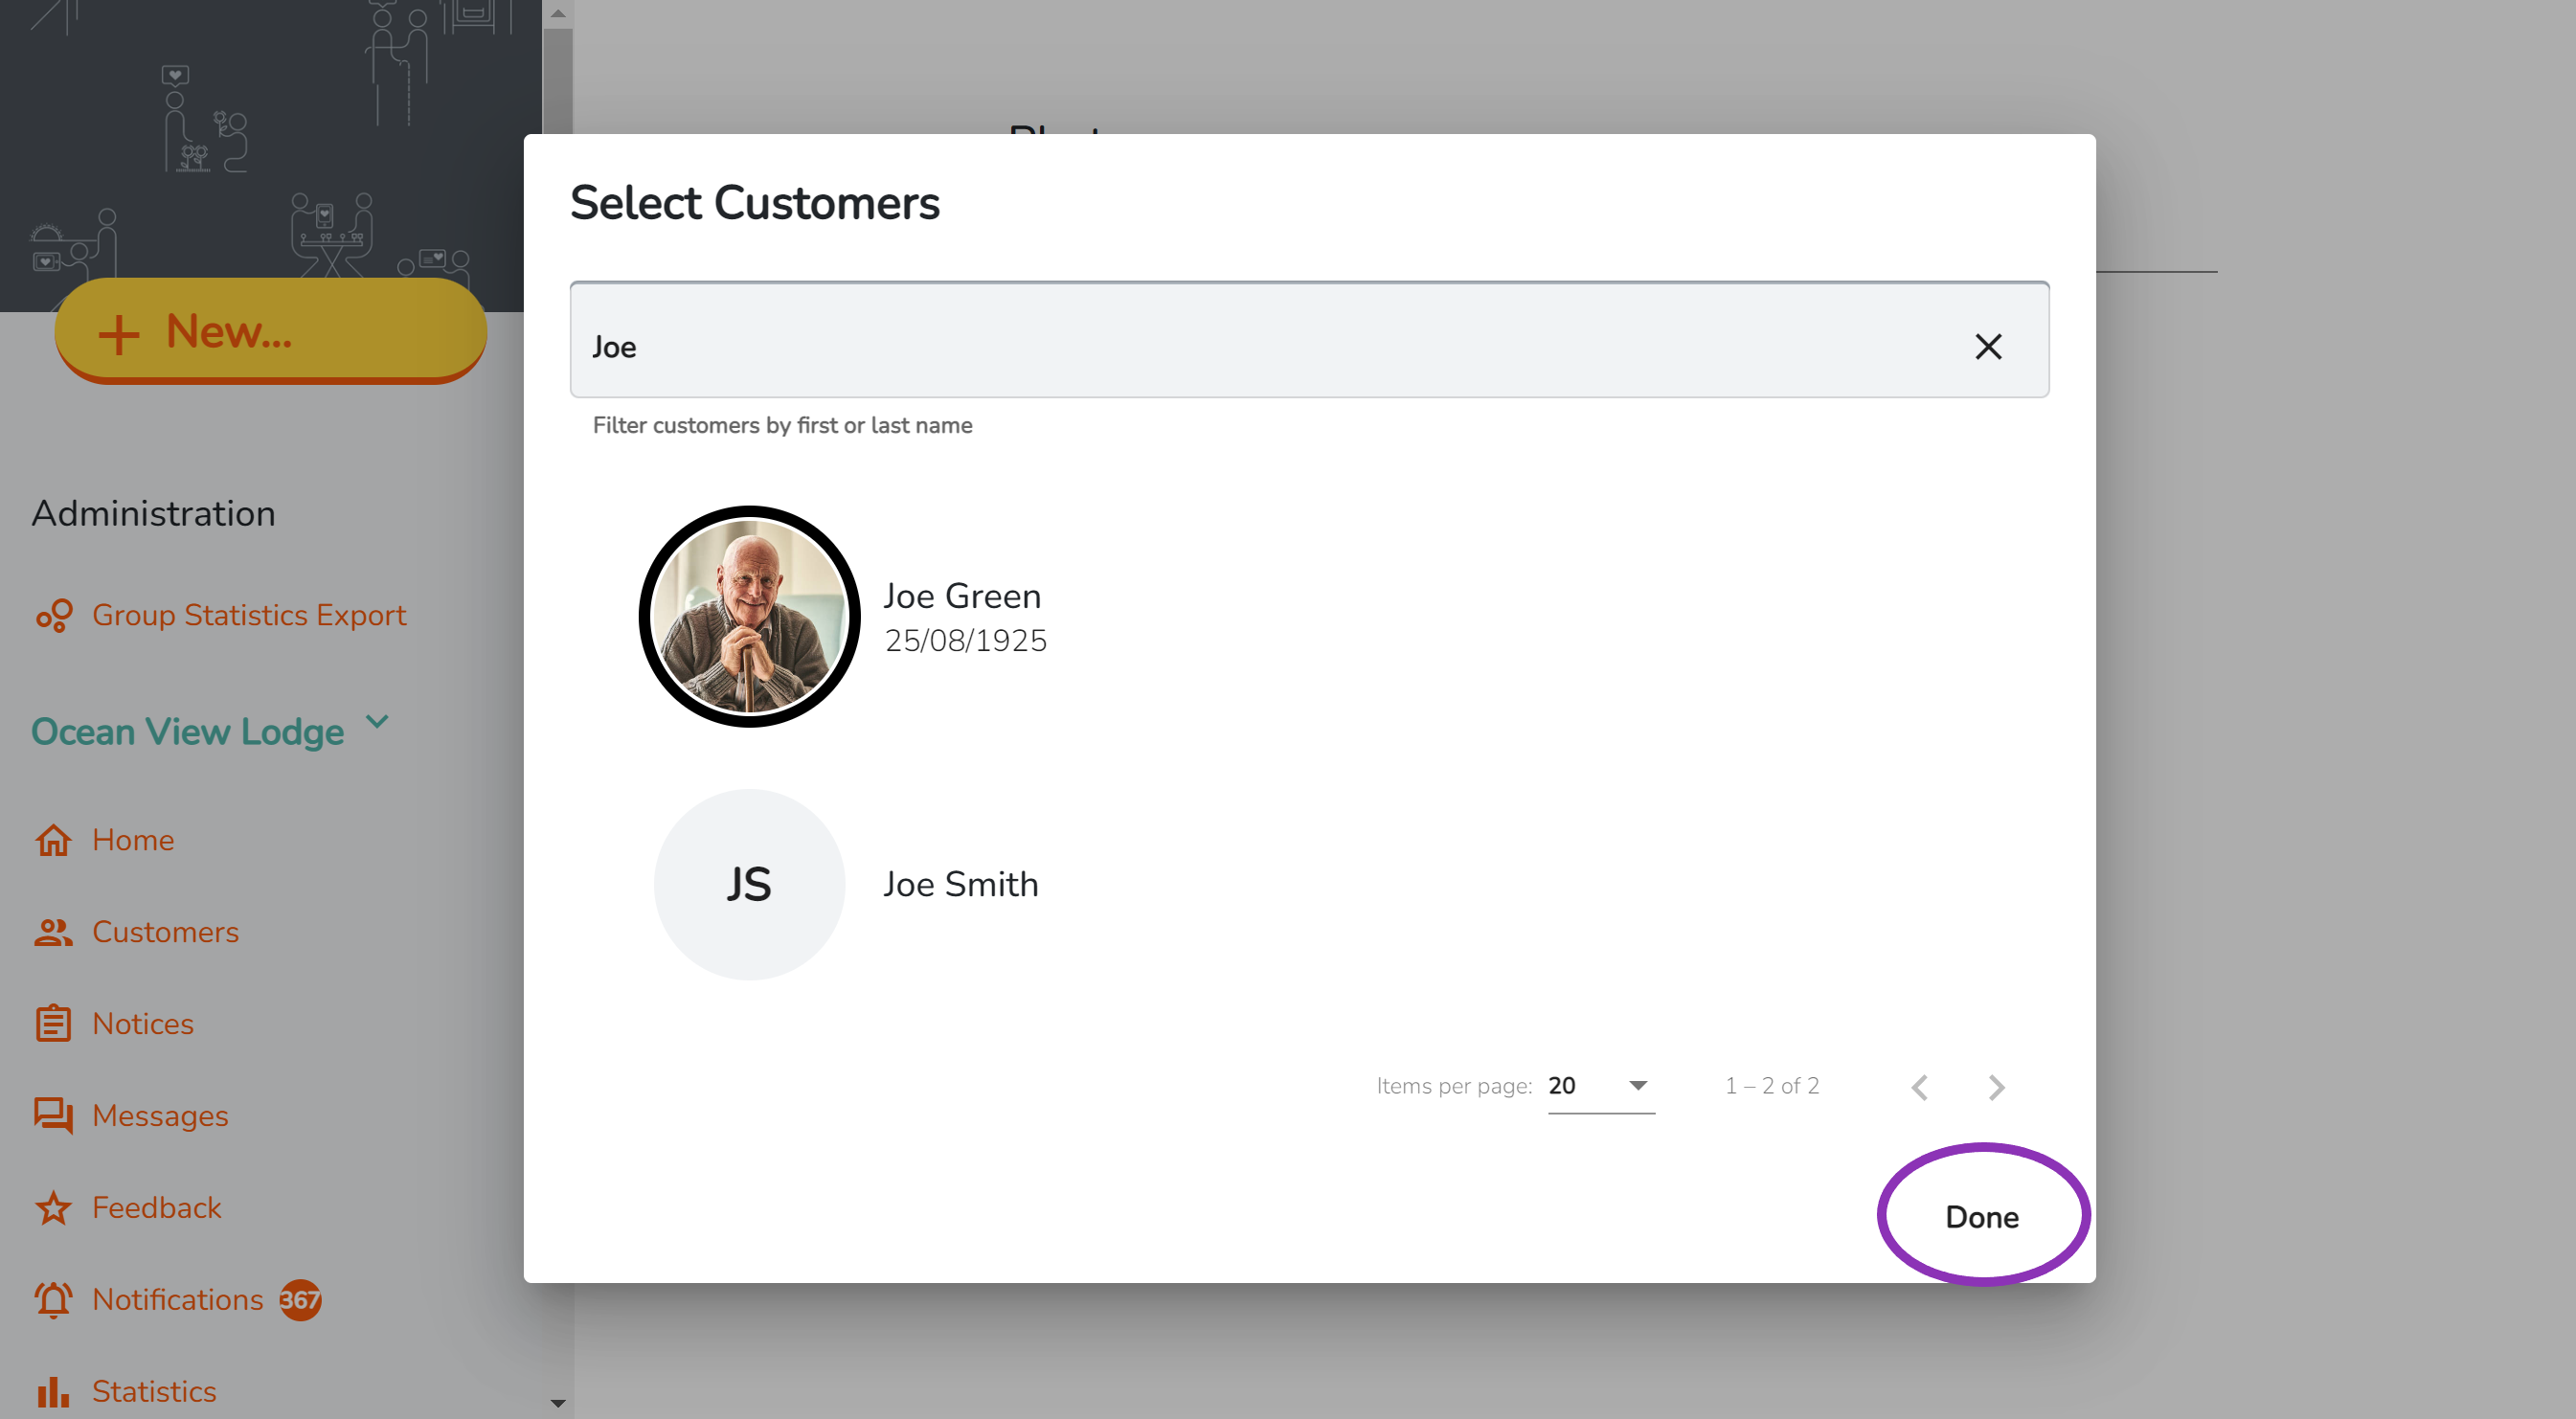
- Once you have selected the customer tap 'Done' down the bottom right of the window.
- You will now be on the create page. To attach a photo to the post click on 'Attach Images'.
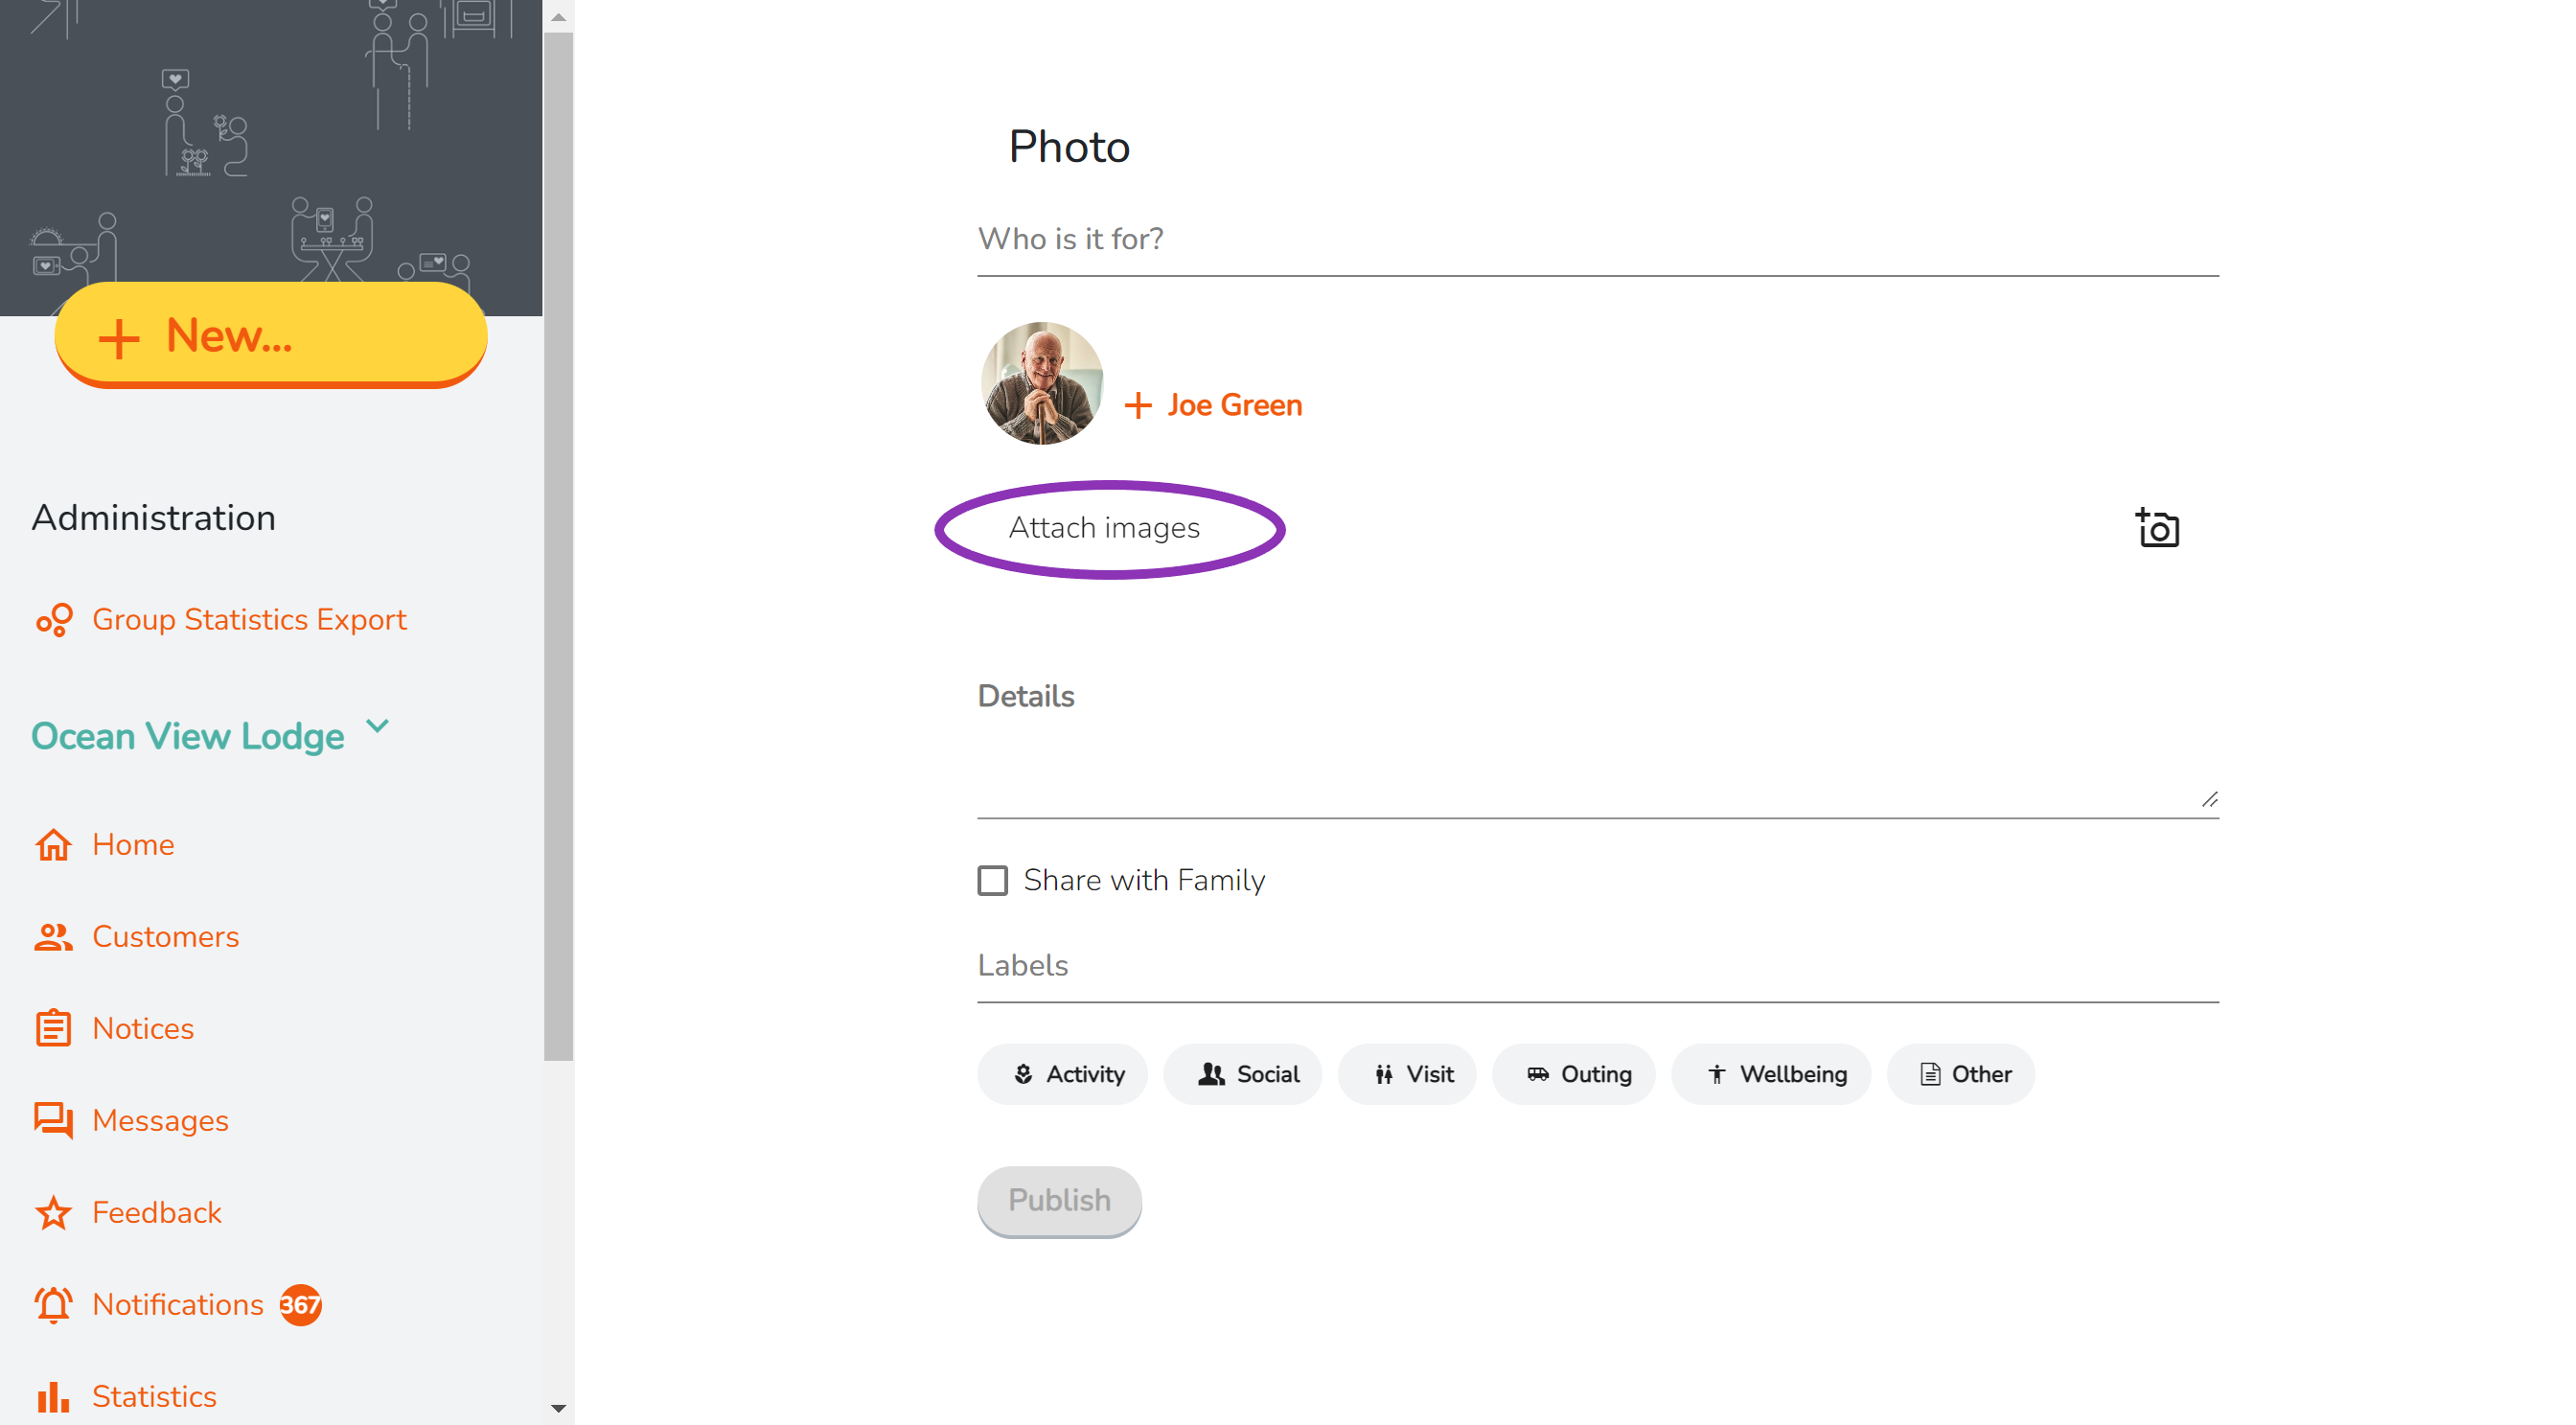
- Select the photos from your files and click 'Open'.
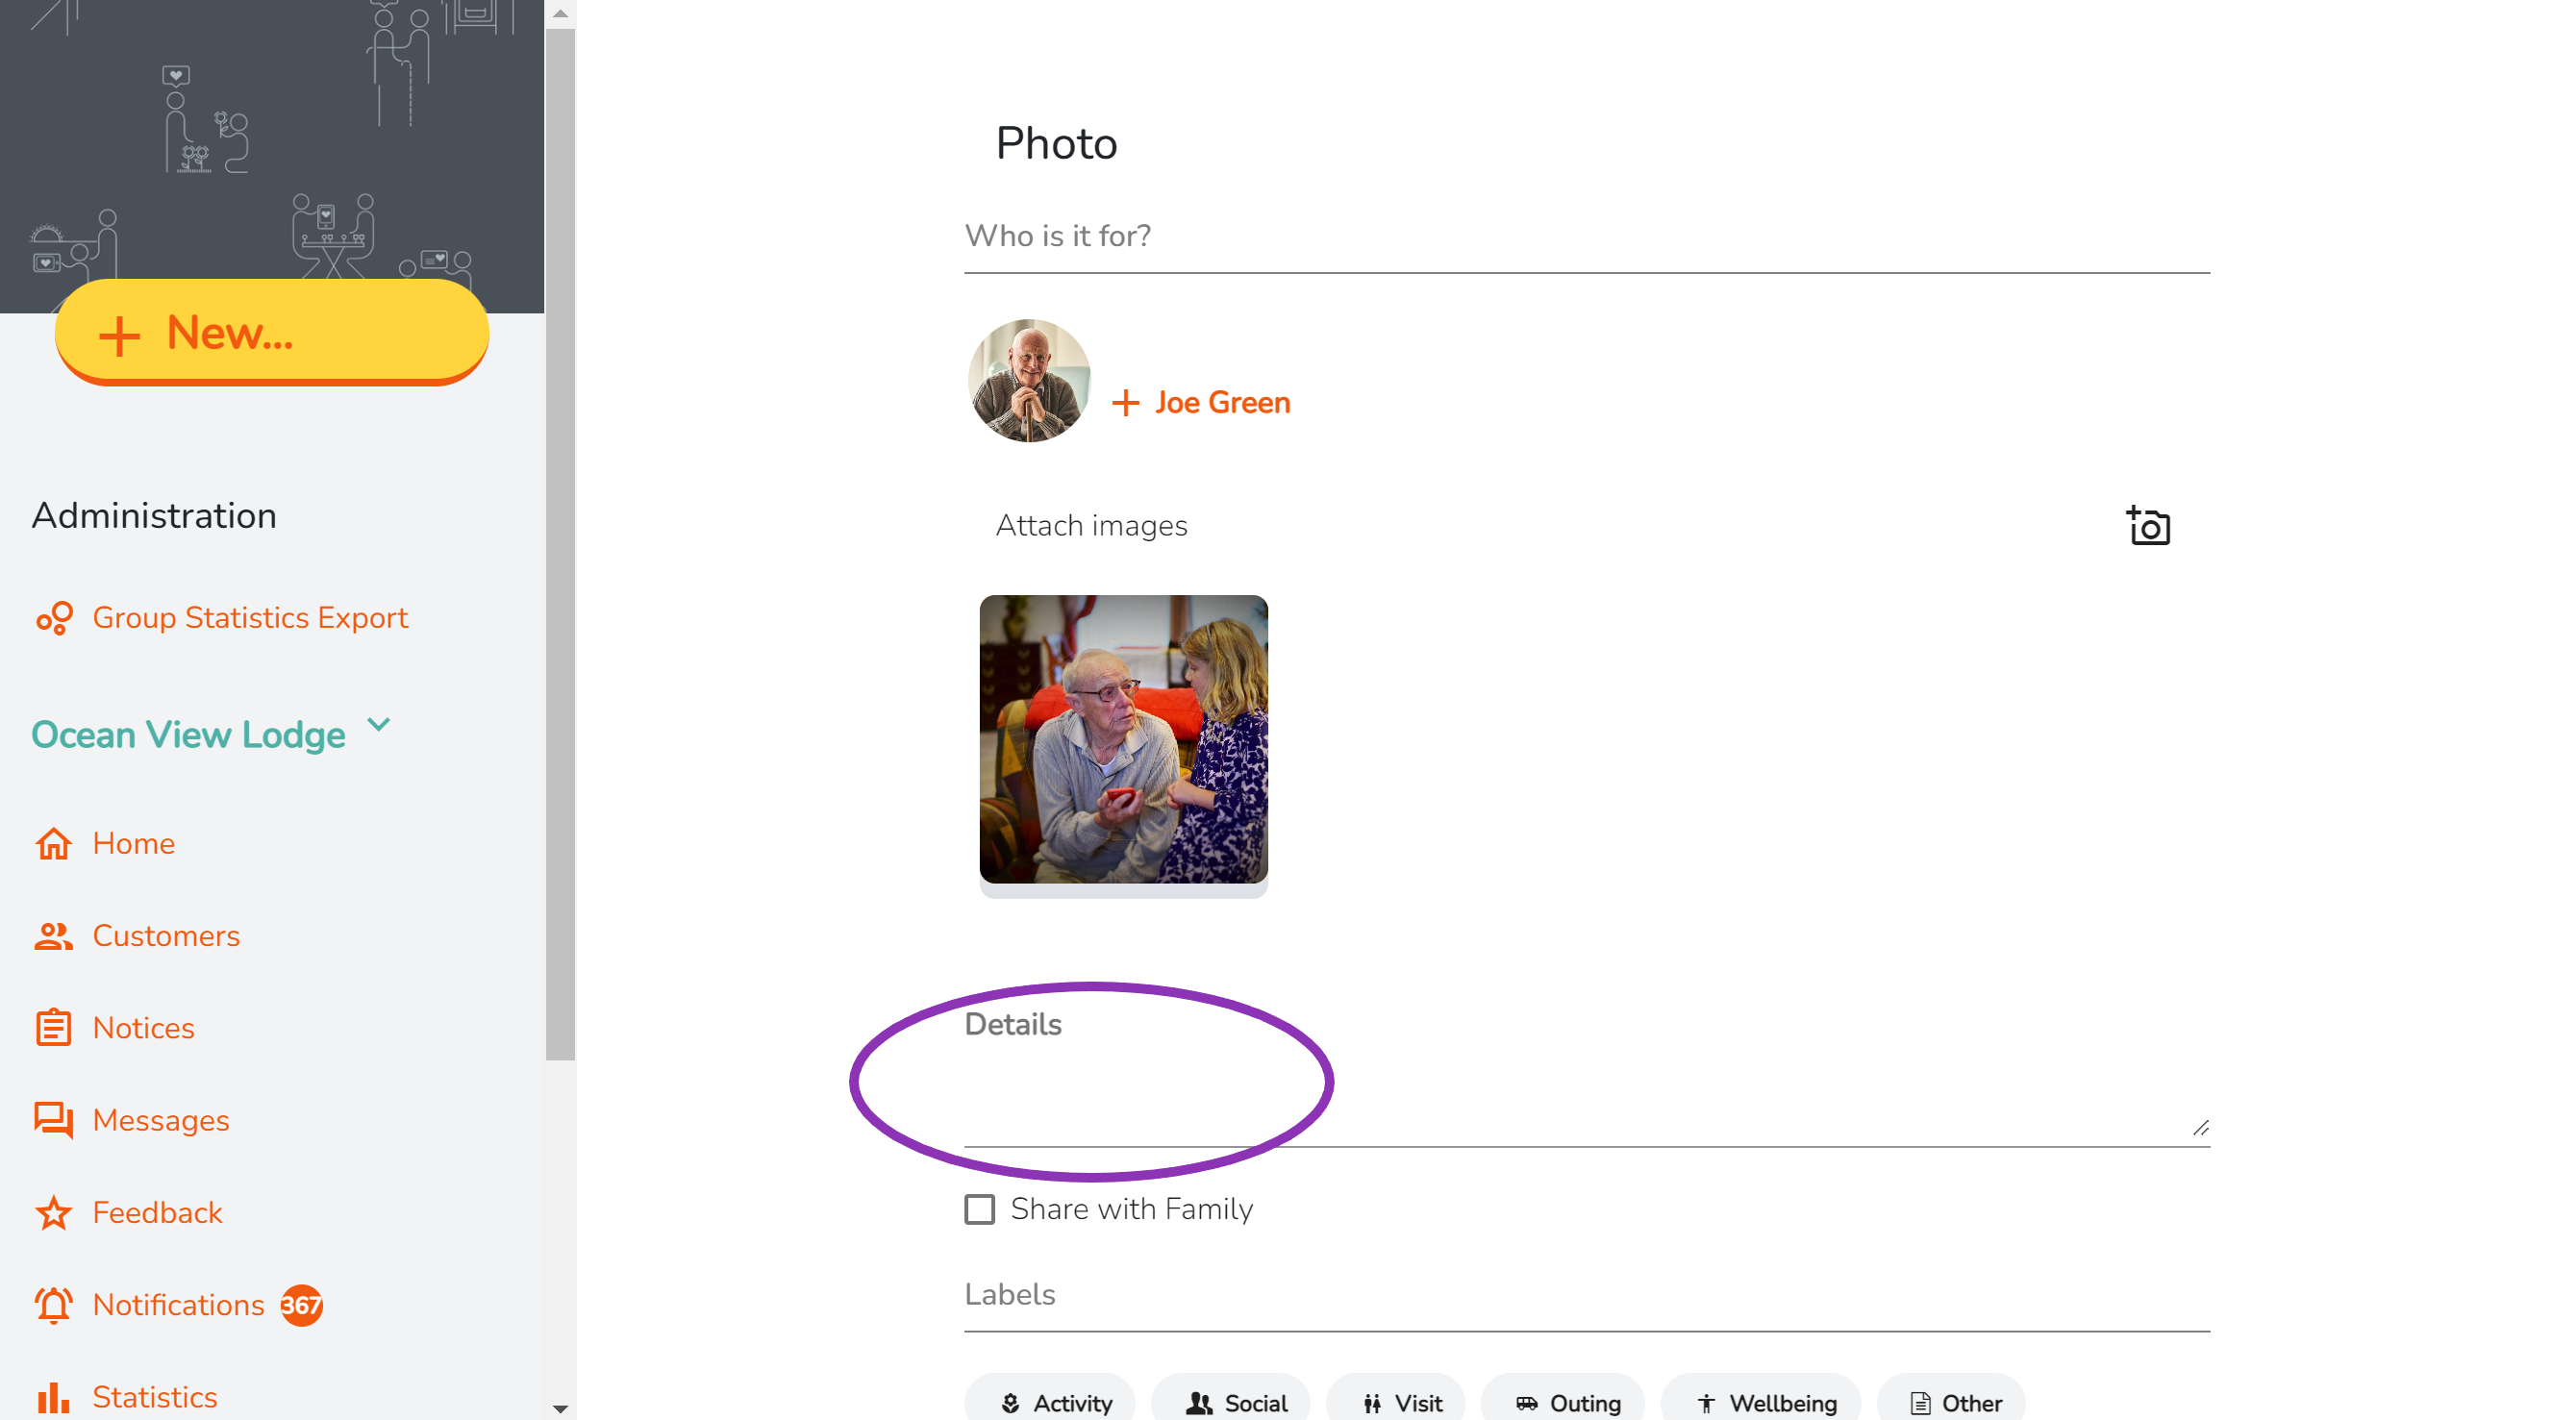
- You will now see the photo attached to your post. A preview of each photo will be shown on the create page.
- Write a message in the comment box to attach to the photo post.
- If you are an Administrator or Coordinator you will have the option to 'Share with Family'. If you are a Team member you will not have this option. Your post will be approved by an Administrator or Coordinator before being shared with family.

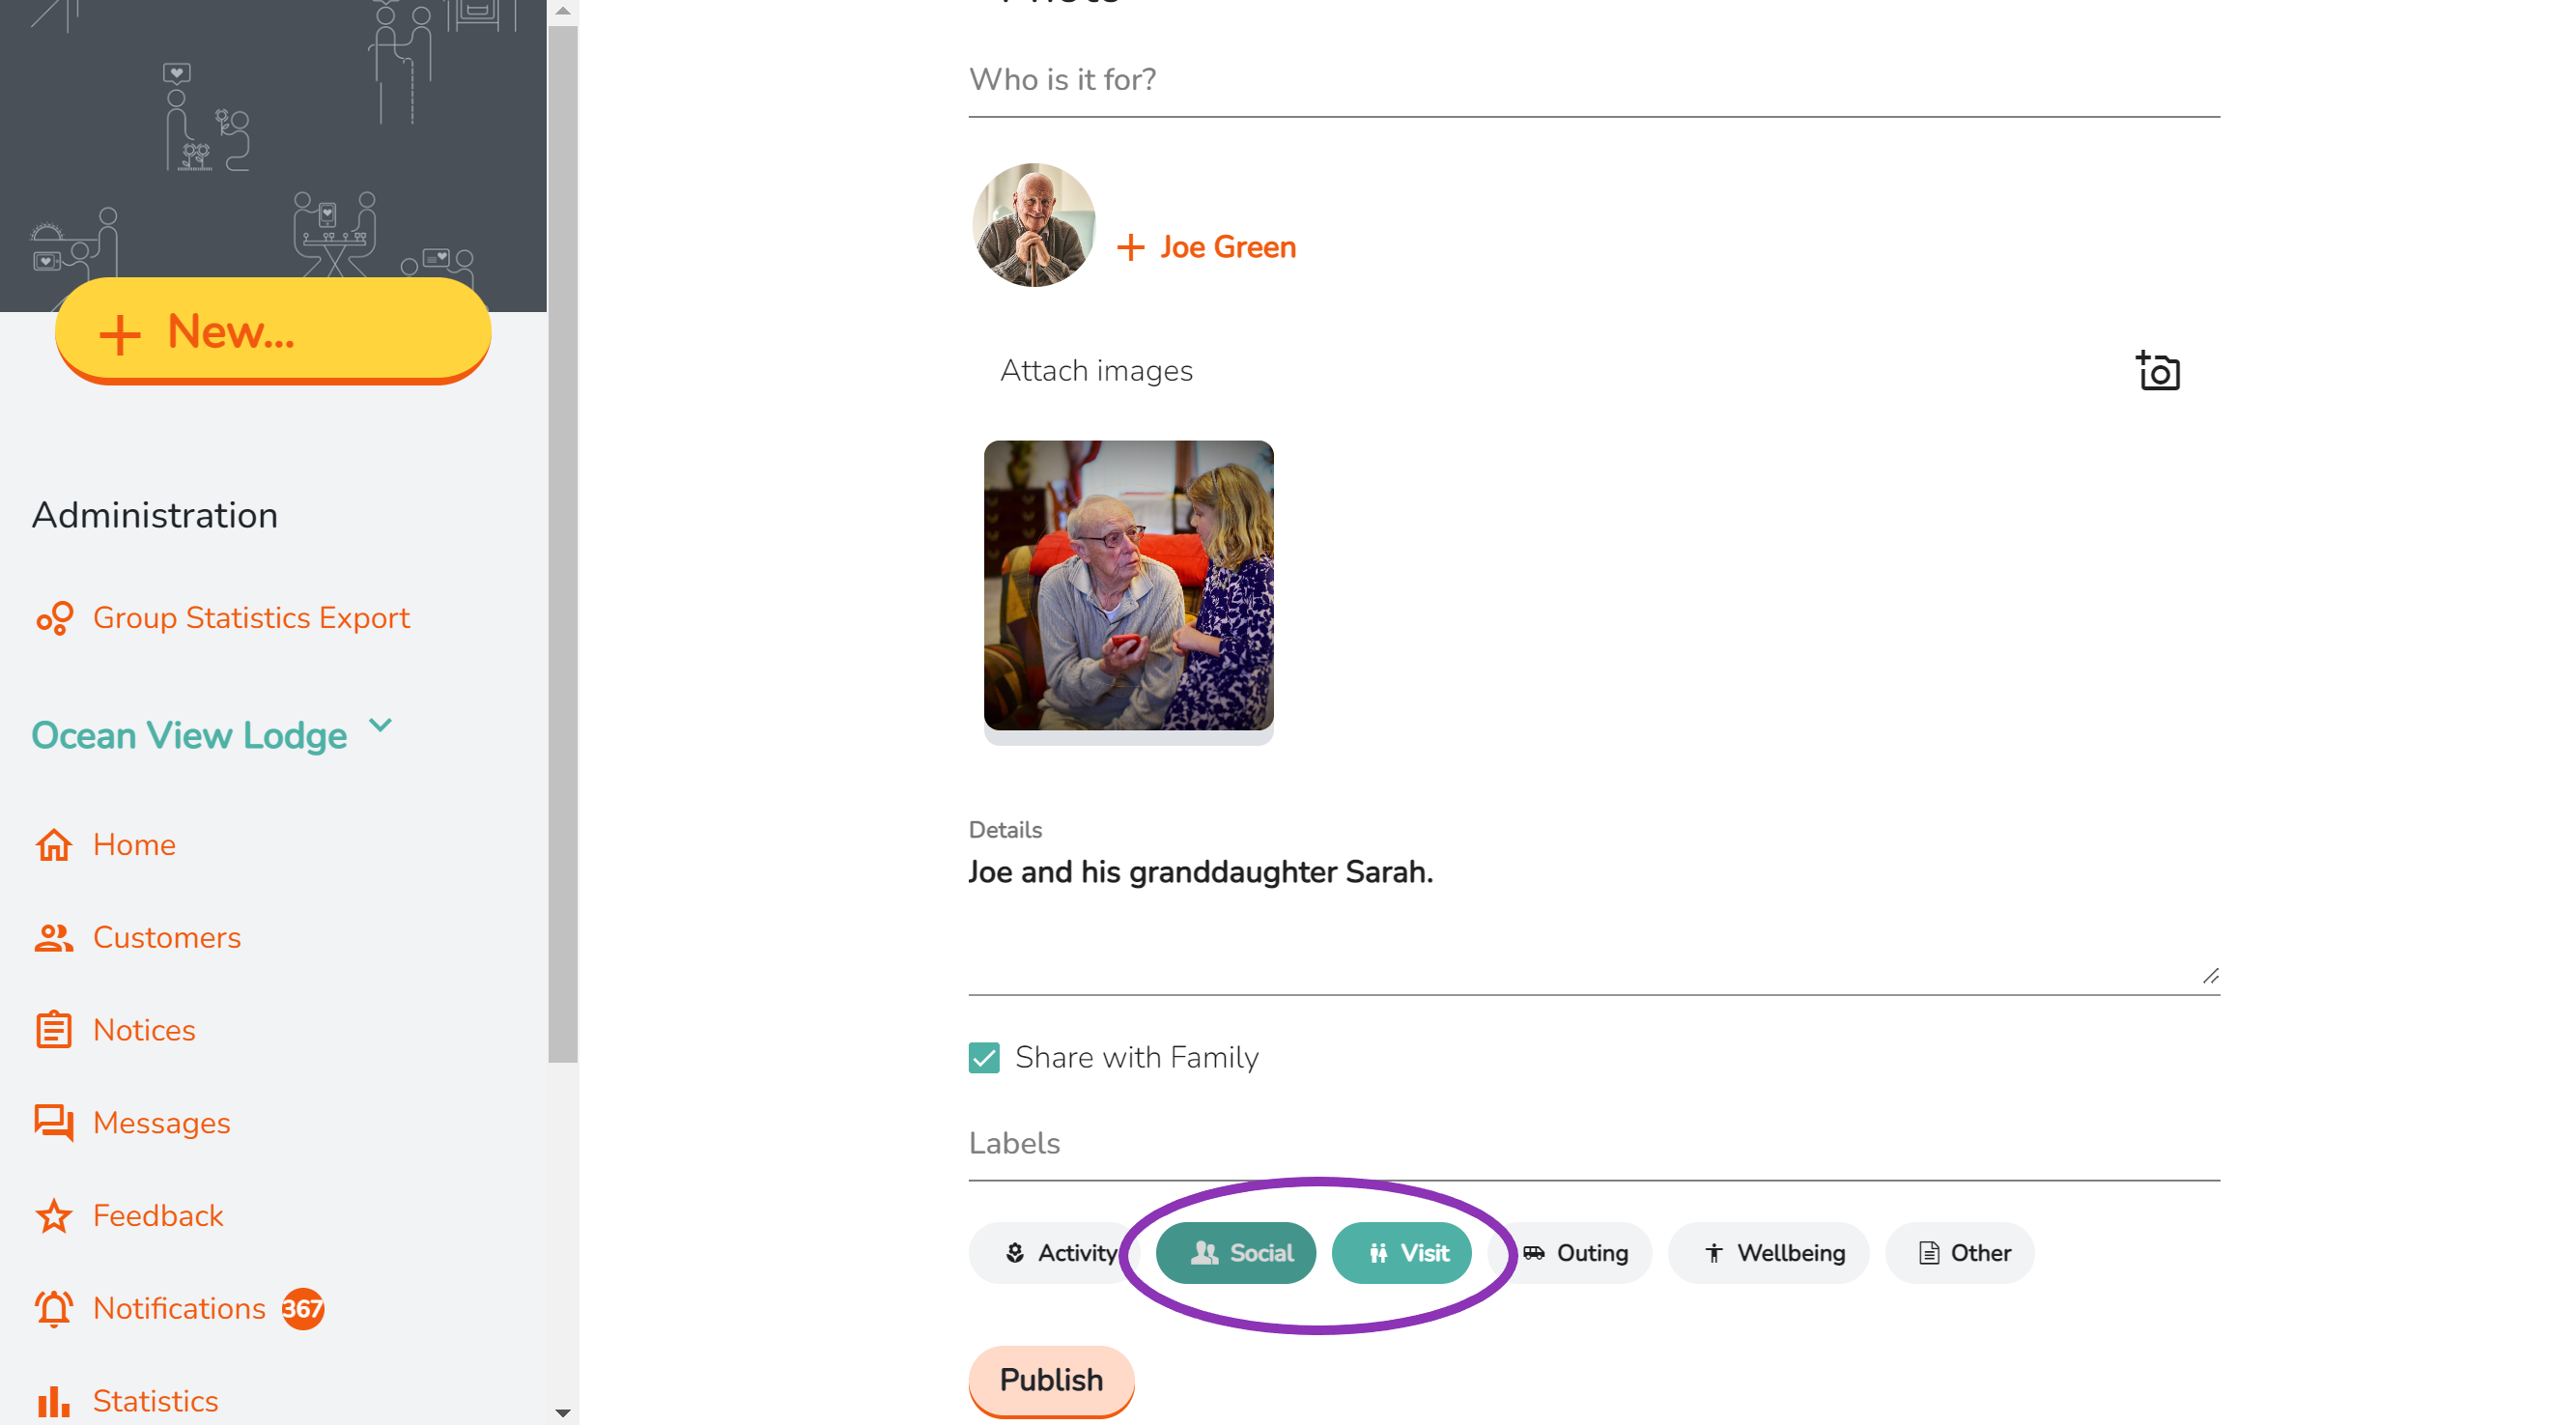
- Choose a label that best describes what is happening in the photo.
- Once you are happy click 'Publish' at the bottom of the screen.
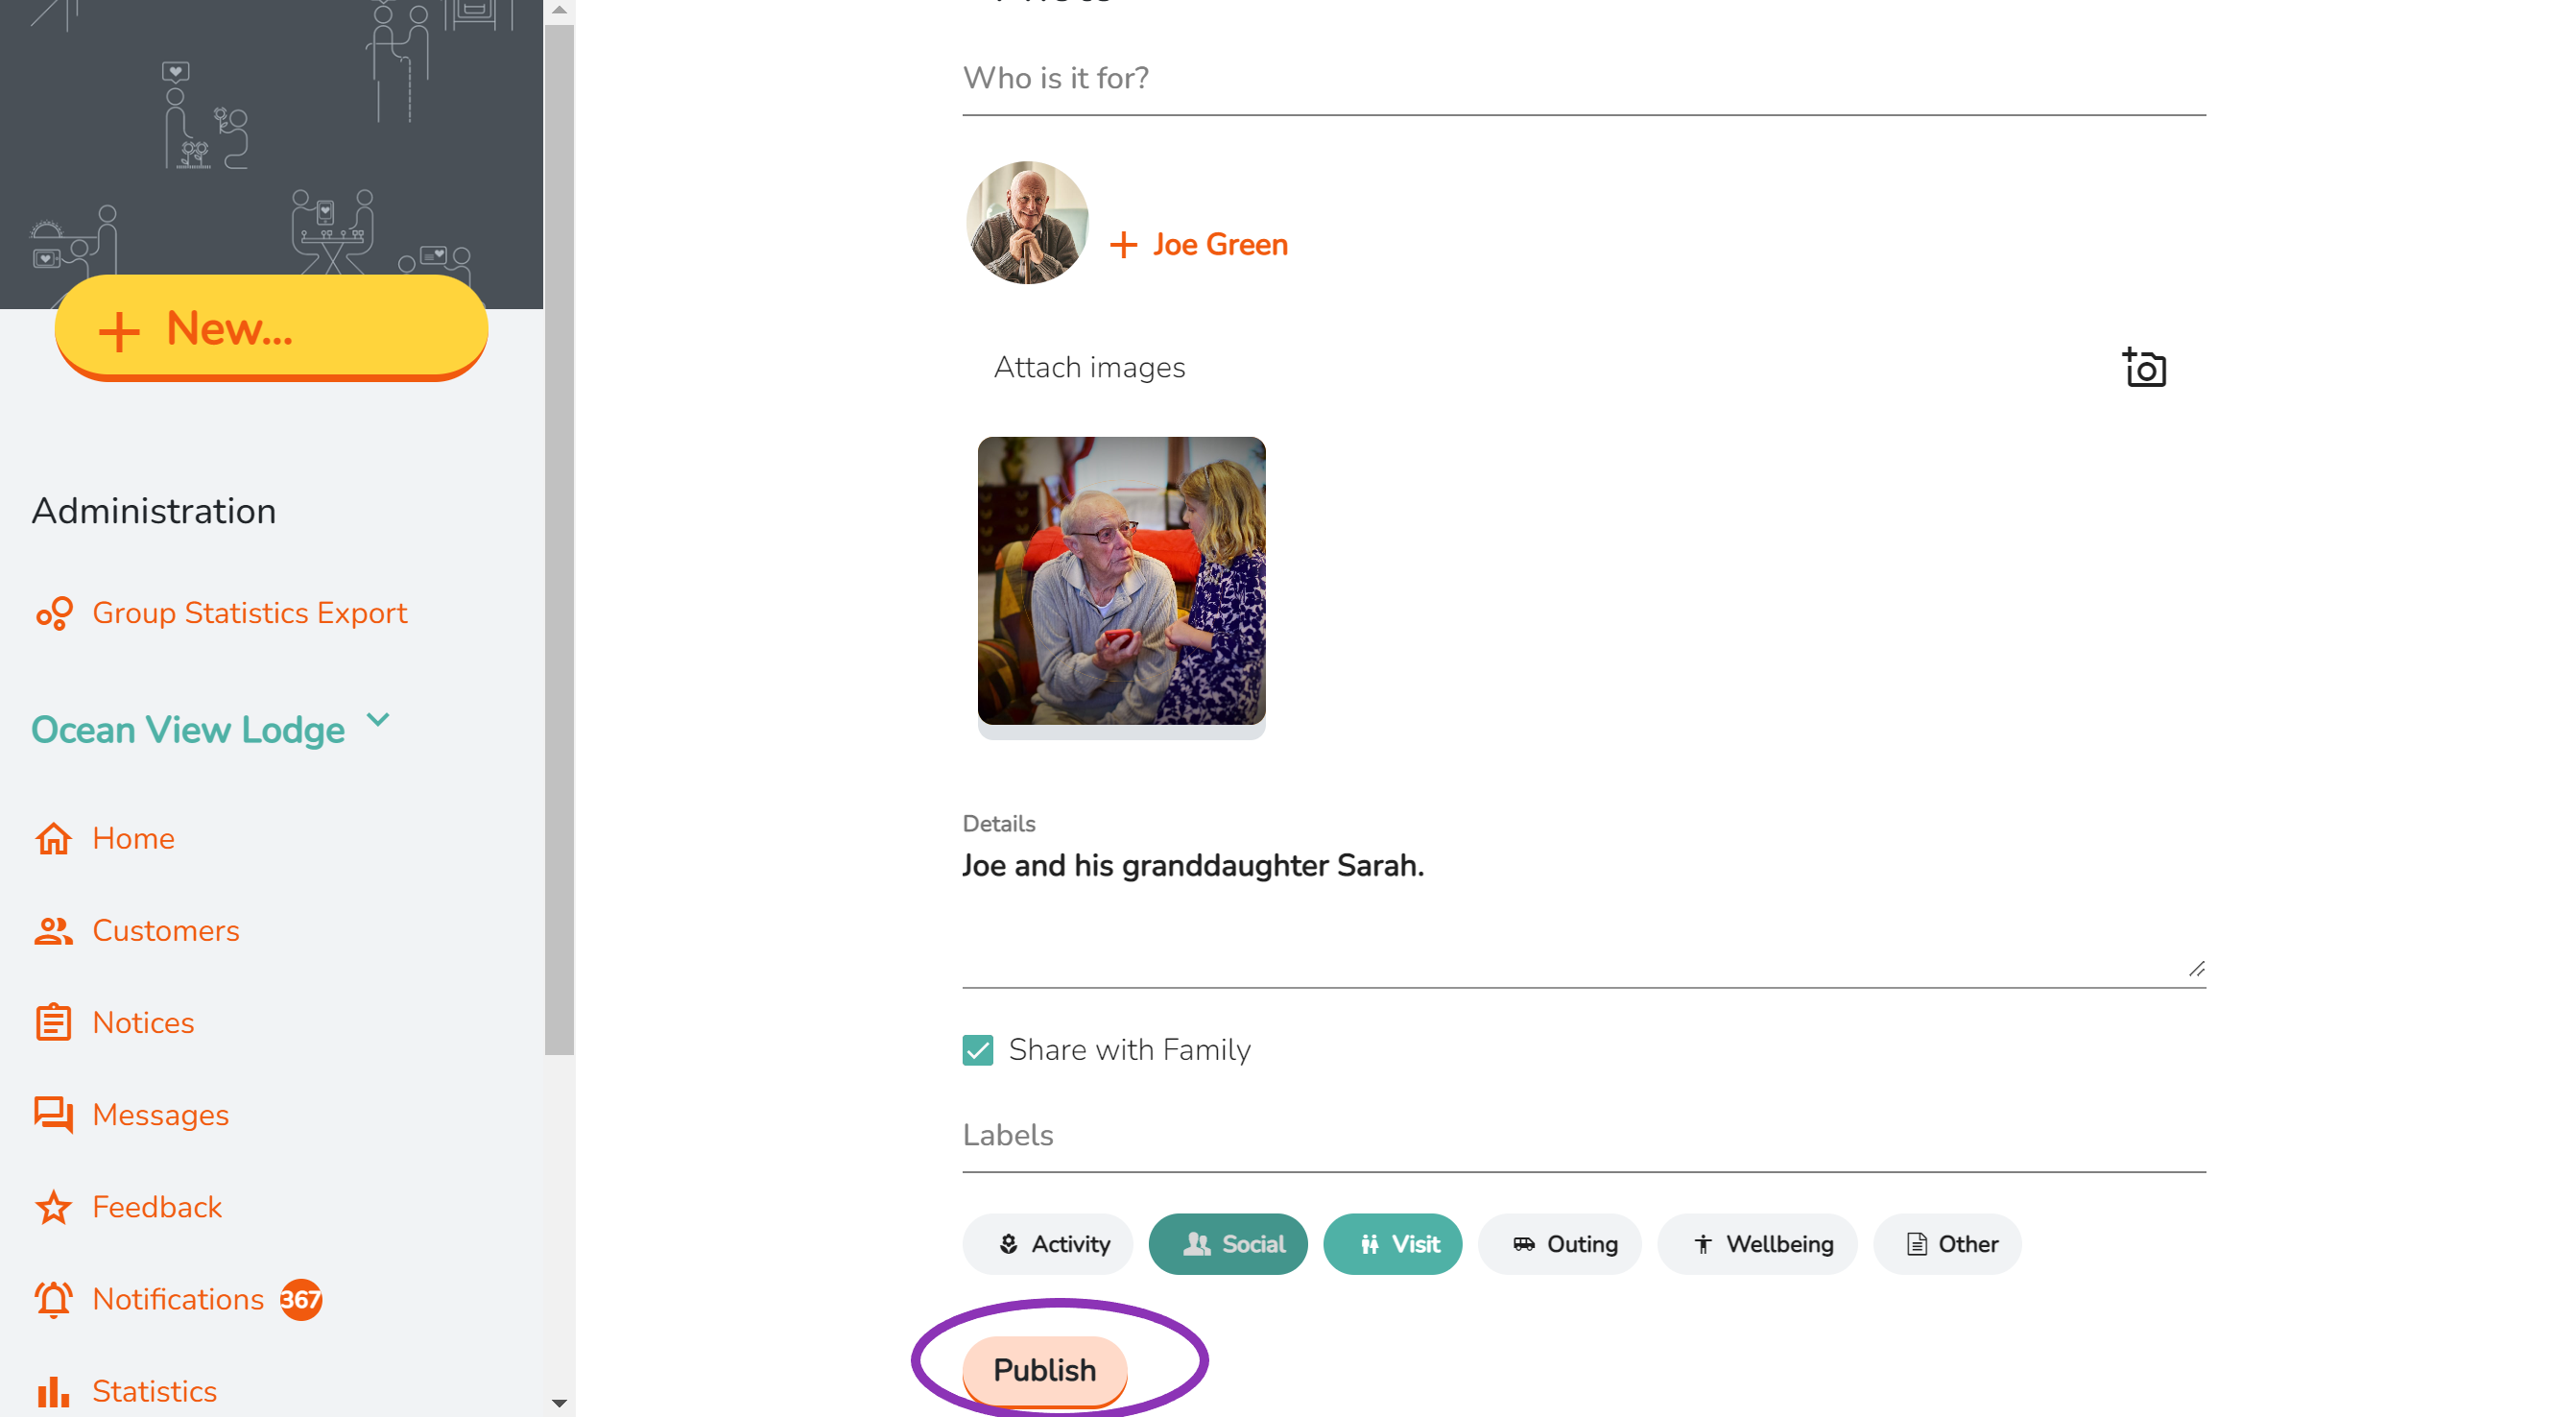
This photo post will now be visible at the top of the feed on the home screen and on the customer's profile.
Delete